The Year in Review: BOBBOL 2013

It’s been a great year thanks to you and all the other wonderful KnitHeartStrings members who came together to learn, share and take the art of knitting to new heights.

projects in the BOBBOL 2013 series

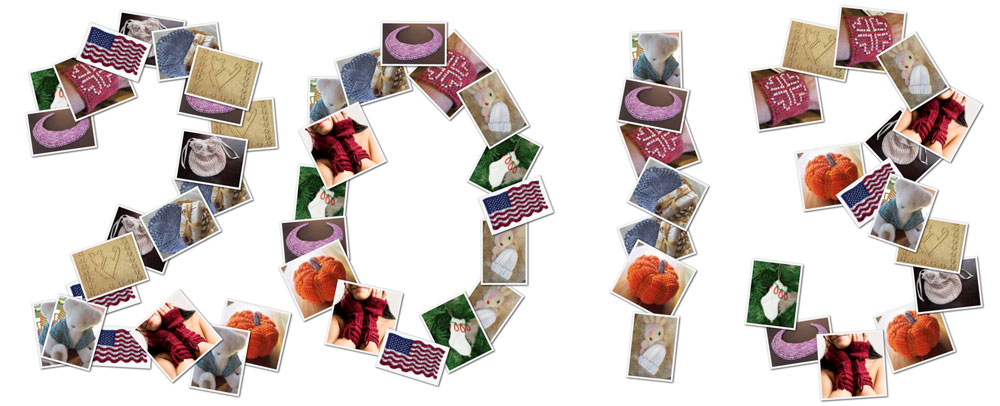
Before wrapping up 2013 and bringing in a new year of knitting, let’s reflect on all we accomplished. And just how far bit-sized steps have brought us in building skills and enjoying knitting even more.

What Was BOBBOL 2013?

A darling little pattern project each month of 2013

All 12 patterns and the 71 support articles comprising BOBBOL 2013 are listed in the Previous KAL’s section of this site.

BOBBOL stands for Bits of Beads/Bits of Lace, and expanded the popular Bits of Lace 2012 Series with additional types of small lace projects and the addition of projects for building skills in beading.

Our goal was to learn and knit along with a little pattern project each month of 2013; i.e. a total of 12 patterns!

Each project was relatively small so it would not involve very much time or materials. Each month’s project was selected with a focus on building skills in bit-sized steps. Those bitty steps in learning can add up quickly! Even if you already knew how, I hope you found the projects fun (and some of you even picked up a tip or trick along the way).

TinaLu wrote: “ You have brought my knitting to a whole new level and I’m enjoying every minute! ”

Bits of Beads and Bits of Lace and Both

Some projects in 2013 were lace and some not. Some were beads and some not. Some were both! Here is the actual break-down:

Beads only: 4
Beading Hearts Friendship Bracelet (January)
Bells on My Toes Holiday Beaded Mini Sock (July)
Little Beaded Pumpkin (September)
Easy Elegance Mitts (November)

Lace only: 4
Seemingly Simple 2-Needle Preemie Hat (February)
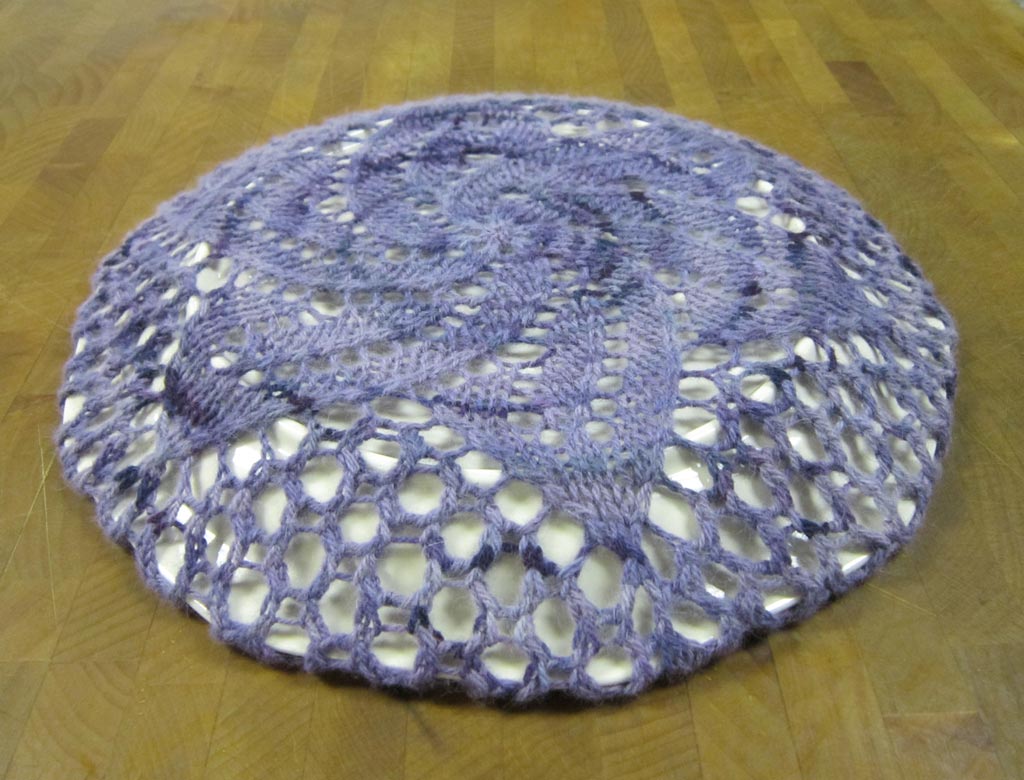
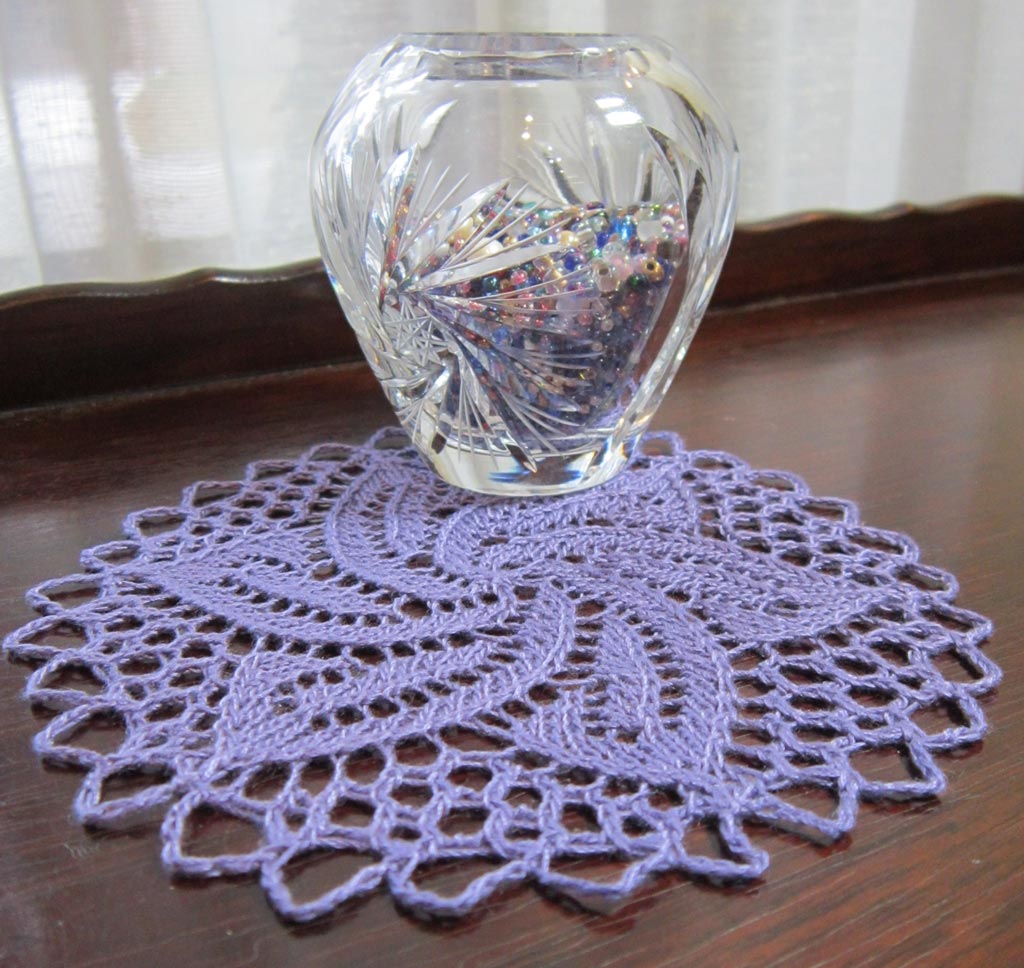
Pinwheel Flower (May)
Kitty In Your Lap Towel (August)
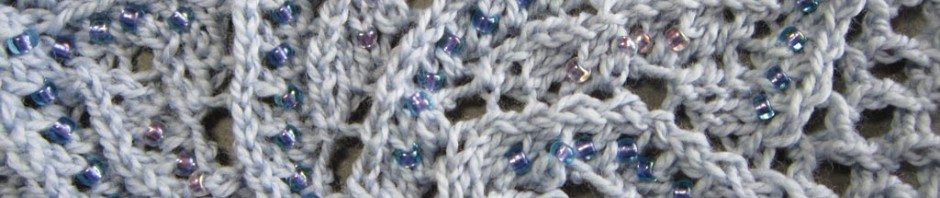
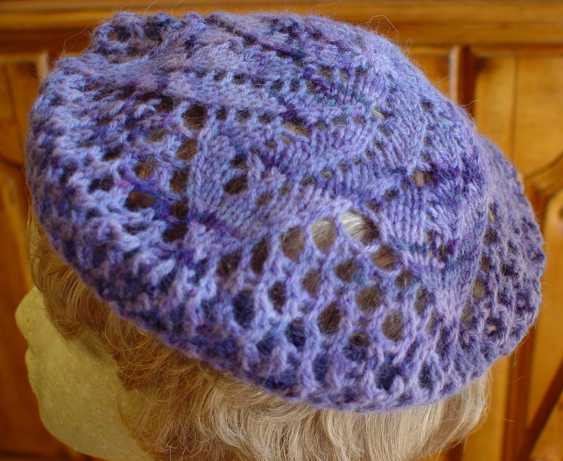
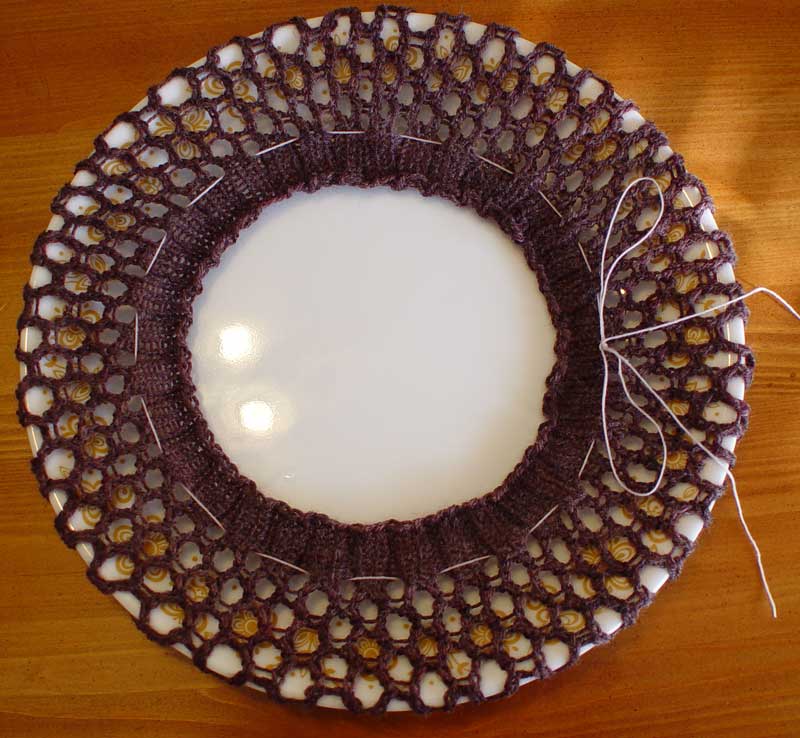
Lace Doily Beret (December) – note: a support article for the KAL also covered some  guidelines for beading the beret

Beads + Lace: 4 
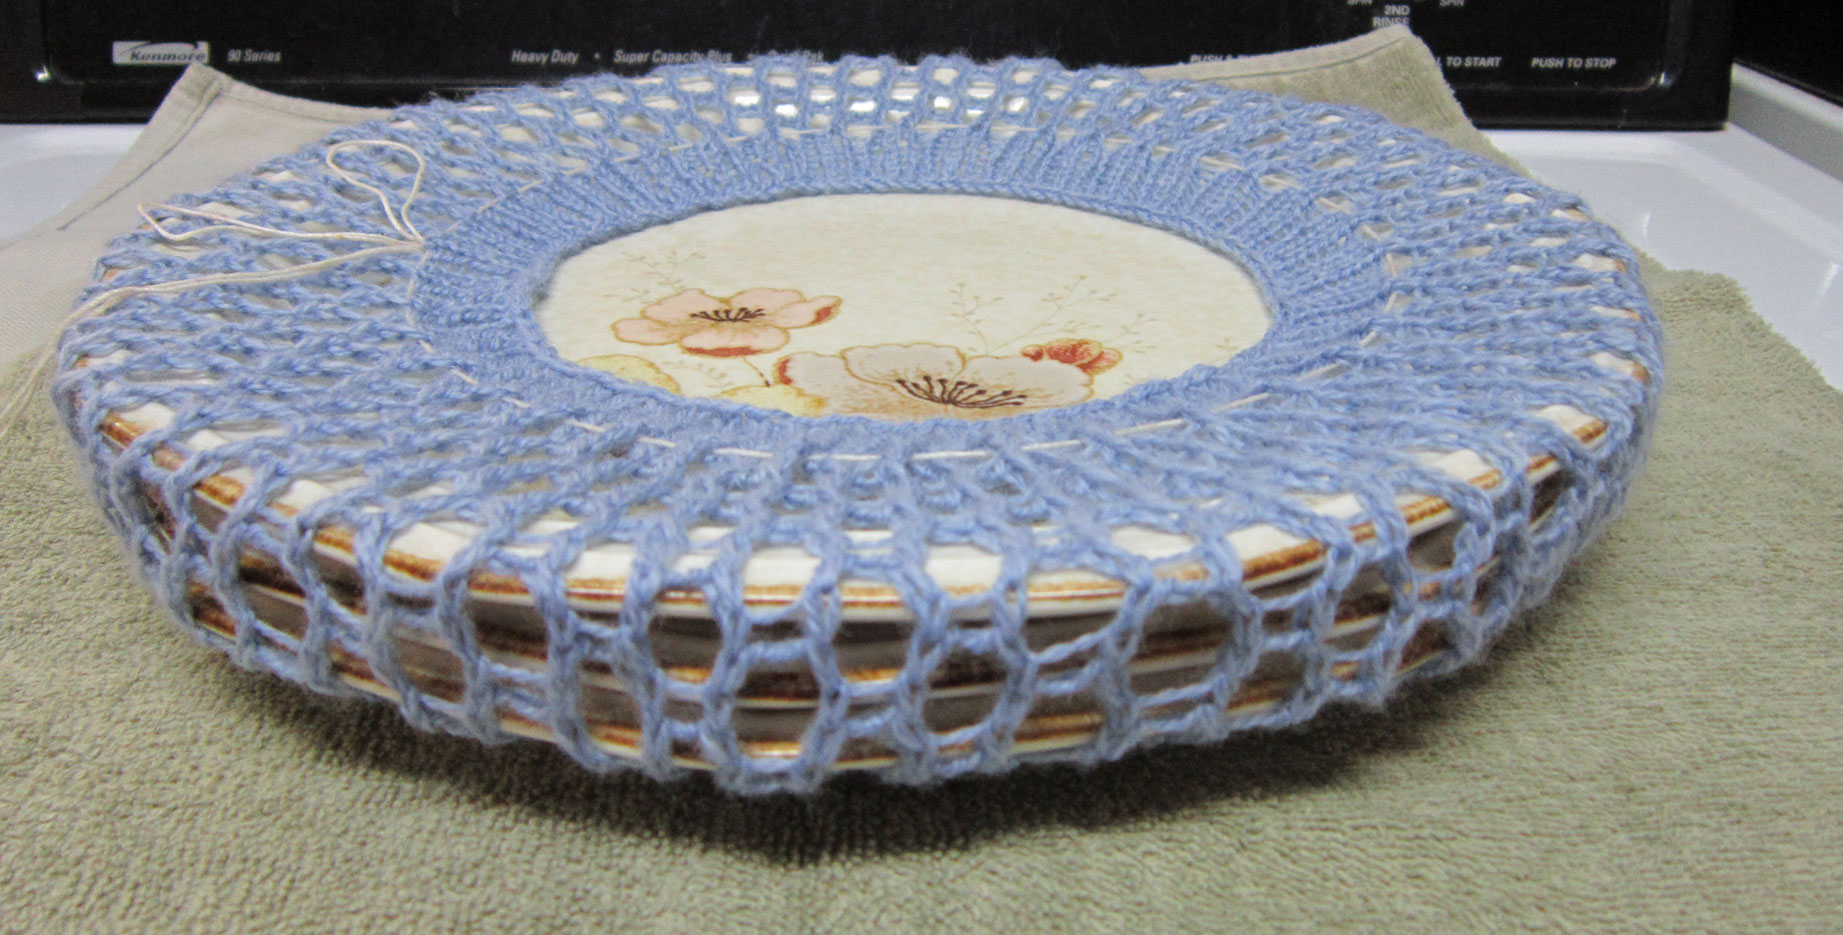
Pretty Awesome Yarn Pouch (March)
Mini Lace and Beaded Flag (April)
Dolly’s Top-Down Tri Shawl (June)
Beaded Crescent Neck Lace (October)

What Was Your Favorite?

Out of almost 20,000 free patterns downloaded by members for BOBBOL 2013, I certainly hope you found lots to enjoy knitting and keep you busy.

The TOP 3 patterns based on number of downloads were:

Pinwheel Flower

Boudoir Gift Basket with Pinwheel Flower Facecloth

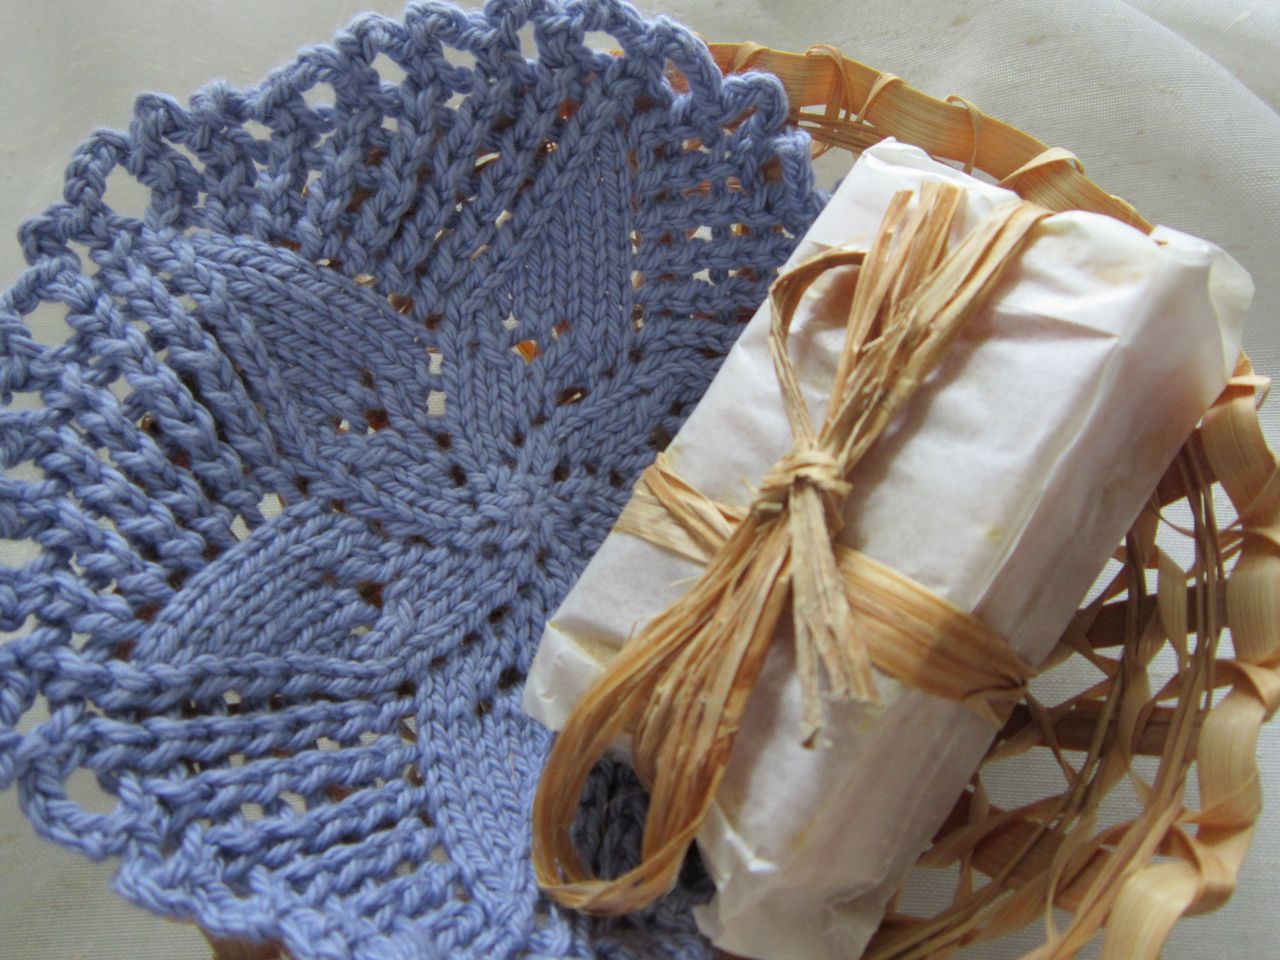
Pinwheel Flower – Bring a little bit of knitting art into your kitchen, bath, or dining entertainment such as Boudoir Gift Basket with Pinwheel Flower Facecloth.

Pretty Awesome Yarn Pouch

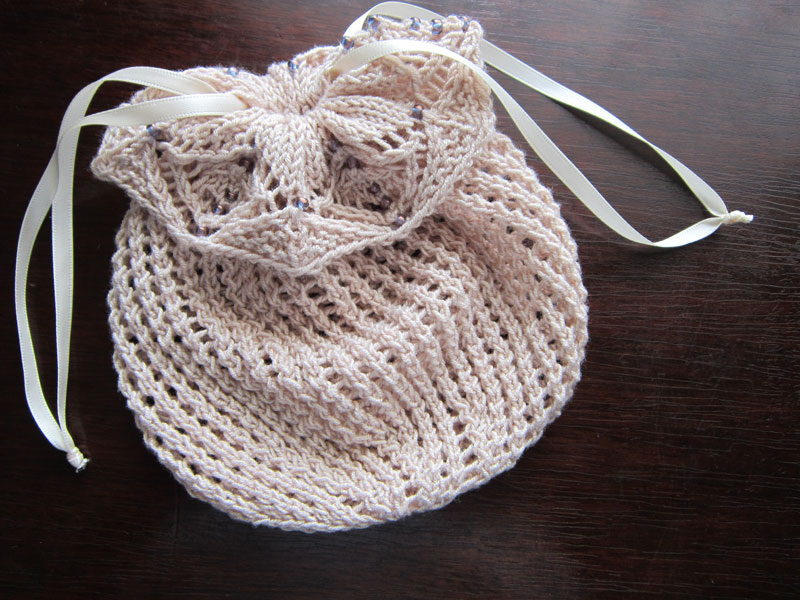
Pretty Awesome – Even your fussiest balls will love being tamed by this protective yarn pouch.

Kitty In Your Lap

b11-kitty-lap-cloth-spinning-wheel-1024

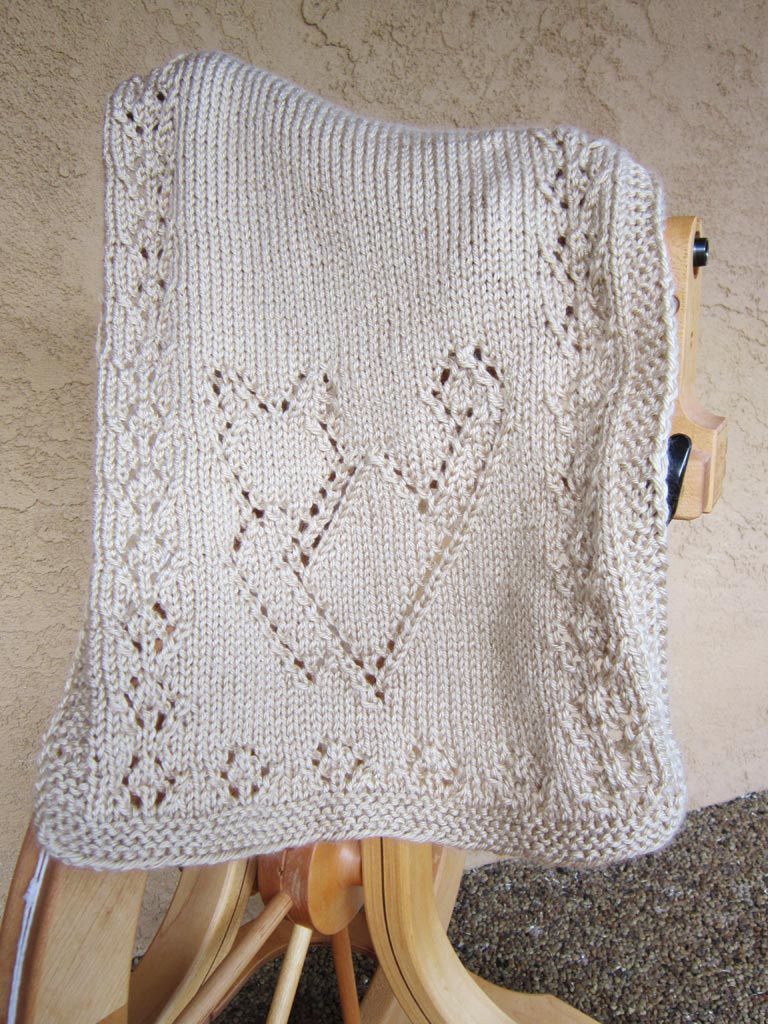
Kitty In Your Lap Towel – Crafty knitters, spinners and crocheters all know the value of using a towel in your lap to provide protection from stray fibers as well as give contrast/lighting for better visibility of stitches or drafting zone.

What do you think? Feel free to comment here and share your BOBBOL 2013 favorite(s) and why.

Wrapping Up the Year

Thank you for making BOBBOL 2013 so successful and I hope you will continue to knit along for Beyond BOBBOL in 2014!

Reminder – Wrapping up this year’s BOBBOL focus on beads, it’s almost time to draw the winner of December’s Giveaway. It is a Special Edition kit with beautiful combo of yarn and 2 colors of beads to make a beaded version of Lace Doily Beret. See details and how to win on the Prize Giveaway page.

Posted in Bits of Beads AND Lace | Leave a comment

Shaping the Lace Doily Beret vs. Tam

After the crown portion of the Lace Doily Beret is completed, several techniques are used to shape the remainder of the hat. None are difficult. By themselves, and together, they are easy ways to manipulate knitted shapes in 3 dimensions.

The Lacy Openwork Ground

For the Lace Doily Beret design, Honeycomb Lace stitch is used as the ground against which the more solid pinwheel motif is set. The lacy ground begins at Round 23, filling in the fabric space between the pinwheel spokes as the crown circumference increases. After the Pinwheel is completed, the Honeycomb ground continues as the main fabric for the hat.

honeycomb lace fills in the background around the pinwheel motif

honeycomb lace fills in the background around the pinwheel motif

Very lacy, openwork ground stitches such as Honeycomb Lace are particularly adaptable to manipulating in 3 dimensions. Because so much of the structure of Honeycomb Lace or similar ground stitches is air, there is a lot of flexibility in manipulating the shape as desired. For the Lace Doily Beret, we use these 3 easy techniques to achieve the distinctive beret shaping:

  • graduated needle sizes
  • eyelet size
  • blocking

Beret vs. Tam

Oftentimes, the terms “beret” and “tam” are now used interchangeably. Going back to their origins, there are some shaping characteristics that differentiate their styles.

Beret is of French origin and is characterized by being flatter and often worn atop the hair and tilted on the head. Tam is of Scottish origin and is characterized by being deeper to hold your hair inside.

As planned in the pattern, Lace Doily Beret creates a shallow French-style beret 10″ – 11″ in diameter.

Lace Doily Beret

Lace Doily Beret

For a deeper tam, work the sequence of rounds 35 – 38 once or more before beginning the Underside instructions. (Note: For the below tam, I worked rounds 35 – 38 just once before beginning the Underside.)

Lace Doily Tam version

Lace Doily tam version

Graduated Needle Sizes

Beginning with round 37 of the underside, the needle decreases one size. Then the needle decreases yet another size on round 43. This step-down of needle sizes is an easy way to narrow the circumference for the underside without any complicated decreasing in pattern stitch. It also allows the eyelet ground to visually continue uninterrupted.

Eyelet Size

Another subtle technique that decreases the circumference of the underside along with the graduated needle sizing is the replacement of the double yarn over with a single yarn over beginning with round 39. This results in the eyelet being smaller as the underside approaches the headband.

Blocking Over Plate(s)

Blocking the beret/tam opens up the lace and produces the completed shape. Using a plate or shallow bowl for blocking the beret works well, placing the crown over the dome-shaped side of the plate.

blocking-beret-over-plate-or-shallow-bowl

Use one plate for the flatter beret style. For a deeper tam, I tried more than one plate which worked well enough (or perhaps you can come up with something similar you have on hand that would work similarly to produce your desired 3-dimensional shape).

blocking over a stack of plates for the deeper tam version

blocking over a stack of plates for the deeper tam version

You don’t want the ribbing of the headband to stretch out, so I suggest lacing a temporary string as shown here and described in the pattern.

using a temporary string to avoid stretching the headband during blocking

using a temporary string to avoid stretching the headband during blocking

Let your beret/tam dry completely in its tensioned/blocked state before removing from the plate(s). Then wear and enjoy!


Posted in Tips & Techniques | Tagged , | 2 Comments

Winner of Photo Challenge; and Your Ideas Going Forward?

I’m pleased to announce that Ellen C is the winner of the recent Photo Sharing/Challenge event showing off projects made for last month’s KAL of Easy Elegance Mitts.

Easy Elegance Mitts and Hat Ensemble by Ellen C

Thanks so much for the time that you and others took to share your projects, and for those who voted to make this a fun event.

Ellen wrote when I contacted her about selecting her choice of pattern prize at the KnitHeartStrings Online Store :

What a nice surprise! It was hard to pick a pattern but I’ve selected the Flared Lace Smoke Ring e-pattern. I’ve got some fingering weight alpaca with sparkles incorporated in it that would work nicely with this.

Thanks so much for the great website and projects. You explain and illustrate the techniques so thoroughly. Today the hat and gloves in the picture are being given to their recipient. I’m excited for her to see them and try them on. Now I need to set aside a little time to make my own!

Thanks again!

Your Ideas Going Forward?

Now that we are into this next month’s KAL, I was scratching my head about whether to continue the monthly photo challenge with prize. Even though the photos submitted for both the Oct and Nov photo sharing/challenges have been fantastic, the participation has been very small compared to the number of active members, both in submissions and voting. So I am asking other ideas that might appeal moreso to you.

Meantime, I have set up a new KAL Projects Photo Gallery page where you can add your photos anytime for any HeartStrings KAL projects. The new gallery page is similar to what we had before with the old gallery, but using the new format and submission process which hopefully is easier and more user-friendly.

I welcome your ideas of ways to make sharing projects we are knitting, or have knit anytime in our KALs fun and interesting. After all, I don’t want to be the only one talking and showing off my knitting, lol. Can you please let me know either by commenting here, or you are welcome to write me privately at jackie@heartstringsfiberarts.com

Posted in Just for Fun | Leave a comment

The Balanced 3-to-2 Decrease

When you get to round 33 of the Lace Doily Beret, there is a stitch sequence that might be new to you. In the pattern, the stitch sequence is abbreviated by a sequence of its parts: i.e. sl 2 tog kwise-k1-yo-p2sso. The Abbreviations section then gives more details for this special technique.

The stitches involved are not something new or difficult, but how they fit together to accomplish the balanced decrease of 3 stitches into 2 stitches might at first look intimidating in the written instructions.

First, let’s look at what the 3-to-2 Decrease stitch sequence will accomplish

The 3-to-2 Decrease is based on the center double decrease (cdd) we’ve used in several of our previous KAL projects this year (e.g. Pretty Awesome Yarn Pouch, Kitty In Your LapDolly’s Top-Down Tri Shawl, and Seemingly Seamless 2-Needle Preemie Hat). The cdd produces a balanced double decrease; i.e. 3 stitches are decreased to 1 stitch, producing a symmetrical pyramid shape with the center stitch of the 3 stitches lying on top of the others. You can think of the cdd as a balanced 3 – to-1 decrease.

On the other hand, sometimes lace designs require 3 stitches to be reduced to 2 stitches rather than 1 stitch.

symmetrical decrease of 3 stitches into 2 stitches

The 3-to-2 Decrease used in Lacy Doily Beret is an aesthetically pleasing way of doing this. It produces the balanced pyramid shape of the cdd, but with the 2 new stitches symmetrically coming out of the cdd base rather than just 1 stitch.

Photo tutorial to create the balanced 3-to-2 decrease

Note: Since the Lace Doily Pattern calls for yarn over before the 3-to-2 decrease stitch sequence (which is typical of lace patterns for decreases of this type), to begin with the yarn is pictured to the front of the work in the photos below.

Insert right-hand needle knit-wise through next 2 stitches.

3-to-2-decrease-step1

Slip the 2 stitches off the left-hand needle, leaving the stitches temporarily on the right-hand needle.

3-to-2-decrease-step2

Insert left-hand needle into next stitch as to knit (i.e. the 3rd stitch of the 3-stitch sequence we are working with).

3-to-2-decrease-step3

Knit that stitch as usual, leaving the completed stitch on the right-hand needle.

3-to-2-decrease-step4


3-to-2-decrease-step5


3-to-2-decrease-step6

Bring yarn forward between needle tips to create the yarn over (yo). Important Point! This is the extra step to the normal cdd that turns a balanced 3-to-1 decrease into a balanced 3-to-2 decrease.

3-to-2-decrease-step7

Insert left-hand needle left-to-right through the 2 stitches that were previously slipped.

3-to-2-decrease-step8

Pass these 2 previously slipped stitches over both the k1 and yo stitches.

3-to-2-decrease-step9


3-to-2-decrease-step9

Now you have created 2 stitches on the new row/round in place of the 3 stitches that were there on the previous row/round.

Please let me know if you have questions so I can clarify anything that might help you enjoy this technique to its fullest. A 3-to-2 decrease is not often encountered, so count yourself in the elite of knitters to know it now.

Posted in Tips & Techniques | Leave a comment

Making It Around the Lace Doily Beret Rounds

Lace Doily Beret wraps up the year by bringing together many of the techniques for knitting lace you have had a chance to learn and practice along the way.

Lace Doily Beret motif

Besides the Easy Start Center Start technique that you can use to help begin beret, I wanted to recap some other key stitch techniques used in Lace Doily Beret. Most of these techniques we have encountered in previous KnitHeartStrings KAL projects for Bits of Lace 2012 and BOBBOL 2013.

In case you need a review or are a newer KnitHeartStrings,  here is a convenient listing  previous support articles to help you knit the rounds following the Center Start for your beret.

Yarn Overs and Stitch Markers

Many of the rounds have a stitch marker near a yarn over. To avoid a possible problem, read Watch Out for Wandering Yarn Overs Near Stitch Markers

Double Yarn Overs

Two successive yarn overs are used abundantly in the Lace Doily Beret. Read Distinctive and Decorative – the Double Yarn Over

We also previously covered Substituting a single yarn over for a double yarn over eyelet which you can consider. But do be aware that doing so will effect a smaller overall beret  since so much of the background honeycomb lace fabric is comprised of double yarn overs. Just a precaution — or maybe use this intentionally for a smaller child size?

The “No Stitch”

For those of you using the charted instructions, odd-numbered rounds 23 – 31 include the “no stitch” symbol. Often misunderstood or confusing to some, The “No Stitch” article can help demystify this symbol if it is new to you, and further explain why it is sometimes used in charts.

The 3-to-2 Decrease

In Rnd 33, we encounter a NEW stitch sequence that creates 2 stitches from 3 stitches. The stitches involved are not something new or difficult, but how they fit together to accomplish the balanced decrease of 3 stitches into 2 stitches is a bit unusual and something we have not yet encountered in our journey of taking the art of knitting to new heights. I’ll be posting a photo tutorial with further explanation in the next-up article.

Shifting the Round

At the start of Rnd 35, the instructions call for shifting the round by one stitch. This is similar to what was done in Pretty Awesome Yarn Pouch, except the shift is in opposite direction.

~~~~~

Hopefully this recap will be helpful in reviewing and avoiding possible stumbling blocks in knitting your Lace Doily Beret. Let me know if you have questions about these or need other help. How are you doing?

Posted in Tips & Techniques | Leave a comment

Bonus: Guidelines to Make a Thread Doily from the Lace Doily Beret Pattern

Besides beaded variations for Lace Doily Beret, you can also branch off into other ways to use the same pattern such as making a thread doily.

Simply put, the approach for making a thread doily from the Lace Doily Beret pattern is to work only the crown portion of the beret using finer thread and smaller needles.

Making a Thread Doily

Use desired thread and knitting needles. Work the main 6-petal medallion (i.e. the charted rounds 1 – 38 in the Lace Doily Beret pattern), then use decorative crochet chain bind off to complete the doily. Wet block under tension similar to what we did for the Pinwheel Flower facecloth project earlier this year.

Thread Doily variation of Lace Doily Beret

Choosing Thread and Needles

The article from last year, Choosing Thread for Lace Edging, contains many good points that apply to choosing thread for your doily as well. Since this doily is not being attached to something else (such as a lace edging would be), you have even more freedom to possibly use threads you have not considered before.

Some possible threads for knitting lace edgings

Just as with lace edging, there is fair amount of latitude in the needle sizes you can use with a thread. Feel free to play and keep notes on the thread/needle size combinations you like best for knitting different types of lace items. Here is my list for thread doilies:

Crochet thread size 5 ~ size US 3 or 4 needles

Crochet thread size 10 ~ size US 2 needles

Crochet thread size 20 ~ size US 1 needles

Crochet thread size 30 ~ size US 0 (2mm) needles

Doily Size

When knitting lace with fine threads such as those listed above, I’ve found that the size of the knitting needles is moreso the determinant of gauge than thread size/thickness. Besides gauge, some other factors that will influence the final size of a doily are —

  • number of rounds
  • openness of lace stitches
  • fiber elasticity of the thread used
  • the amount you stretch your doily during blocking

For the doily pictured above, I used a Tencel thread similar in thickness to crochet thread size 10 and knitting needles size US 2. The blocked size is 6″ diameter and weighs only 3.6 g  (1/8 of an ounce) just to give you an idea of size and amount of materials needed.

Posted in Bits of Lace | Tagged | Leave a comment

Starting the Lace Doily Beret

Jessica wrote: “… My knitting skills are growing SO quickly in regards to
texture, lace, and beading. Thank you so much Jackie!

December’s KAL for Lace Doily Beret wraps up the year of BOBBOL 2013 with some techniques we have seen previously (you can use these as a practice review or just applaud yourself on all you have accomplished so far). There are also some new things to continue our journey in taking the art of knitting to new heights.

Lace Doily Beret

Lace Doily Beret

Center Start

To get started on the Lace Doily Beret, there is a photo tutorial for Easy “Cheating” Center Start to help you if you need it.

Easy cheating center start

Yarn Overs at Beginning of Round

The rounds of Lace Doily Beret often begin with a yarn over (or even a double yarn over), so a review of this similar technique article should be helpful if you are pondering how this might work and look.

New Journeys

Watch for upcoming discussion of these other techniques used in later stages of knitting Lace Doily Beret:

  • 3-to-2 decrease
  • graduated needle sizing
  • beret vs. tam?
  • blocking in 3 dimensions over a plate(s)

p.s. Are you in? Plan now for KnitHeartStrings 2014: Small Projects with Big Impact. KnitHeartStrings members get bit-sized tutorials, tips and techniques, along with a free pattern. Please help me spread the word and invite your friends to join at KnitHeartStrings.com.

Posted in Bits of Lace | Tagged | 1 Comment