While knitting lace, do you worry whether you are going to like the outcome? That’s where blocking in progress comes in. Here is how.
How are you coming along with your I Heart Filet Lace scarf? Like most lace knitting, filet lace benefits from blocking.

filet lace bias distortion before blocking
I don’t want you to be freaking out if your filet lace is looking similar to this.
Now that is some seriously bad distortion. The natural bias is caused by all the left-leaning decreases. Remedying this distortion is possible with a good blocking. Rather than taking my word, I will show you how and then I want you to try it, too!
You don’t need to wait until you complete your scarf to block and prove to yourself that you are on the right track. I often like to do a blocking once I have a generous sample-size knitted. It gives me comforting satisfaction to see what the lace is really going to look like, and gives me motivation to keep knitting.
Note: I am going to assume you are using a yarn made predominantly of natural fibers, as was recommended in Getting Started with Filet Lace Knitting: Tips for Selecting Materials and Supplies.
The 5 Steps of Blocking in Progress for Natural Fibers
Step 1: Knit to a large enough size so as to have a good indication of results.
Typically I will work to about 8″ to 10″ length, i.e. the equivalent of a good-sized swatch.
Step 2: Put your stitches on hold.
I usually knit with a circular needle, even for flat knitting. So for this step, I just scoot the stitches onto the cable portion of the circular needle that is capable of sustaining a bit of moisture. After the blocking in progress has been completed, it is easy to resume knitting right off the circular needle.
Another method would be to slide the stitches onto a smooth, firm cord or crochet thread. A favorite of mine is braided Dacron trolling line – available in the sports and fishing section of stores.
Step 3: Thoroughly wet the portion of knitting you have done, less about 2″.
Soak the lower portion of the knitting you have done to within about 2″ of the stitches on hold. Just leave that upper area alone. It is ok if it gets damp, but don’t stretch and pull on it. To thoroughly wet natural fibers, a soaking time of at least 30 minutes is needed. Some fibers, especially silk, take a lot longer than you realize, to really get thoroughly wetted.

soaking a portion of the lace
Since I have my stitches on a circular needle, you can see how I just hung that over the edge of the dishpan that I had filled with some plain water. It keeps the stitches on hold far enough away from the water so that it doesn’t creep up into that area.
Step 4: Tension block the wet lace into its un-distorted shape and let dry thoroughly.

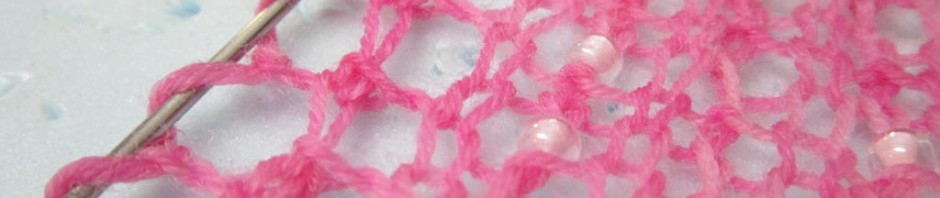
blocking in progress with wires woven in and out
Use rustproof pins and/or wires for this step, just as you plan to do for the finished article. Shown here, I used blocking wires inserted through the lace holes around the edges. (Actually, for the shorter top and bottom of the scarf, I just used straight lace needles as my “blocking wires”.)
The wires and pins don’t go through the actual knitting. If you are using wires, then pins are just needed occasionally to hold the wires taut.
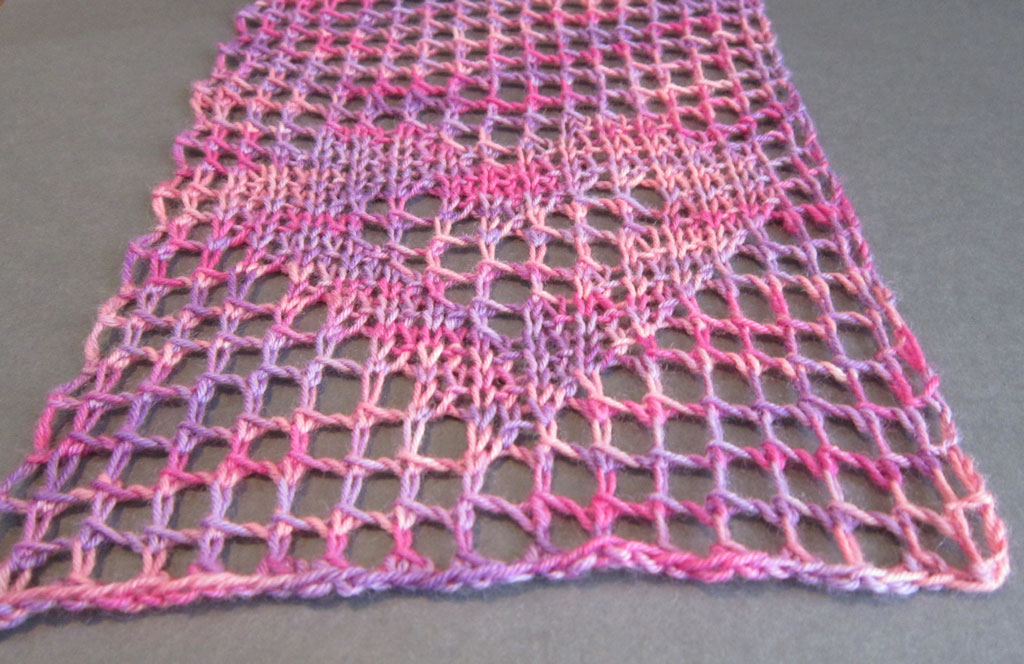
The fastest way to insert the blocking wires is to weave them in and out of the column of holes along the edges, as shown in the darker multi-pink scarf to right. This is my usual method.
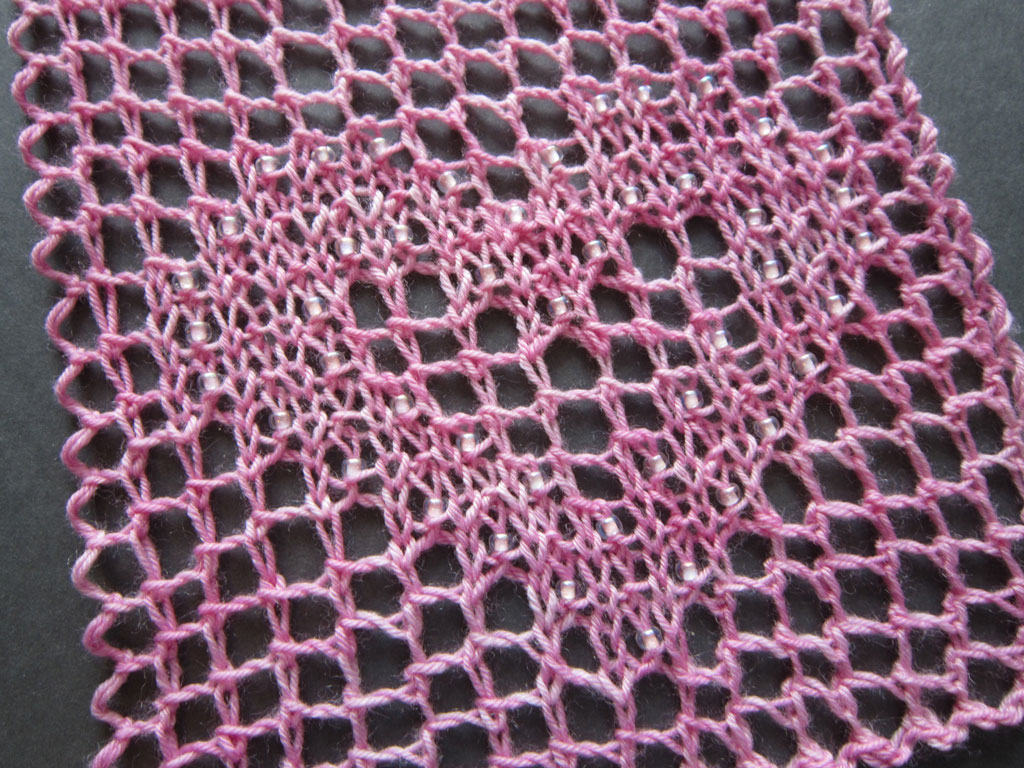
For the lighter solid pink beaded scarf below, the wires along the side edges and bottom edge were wrapped around the edges of the holes. This latter method is more tedious to do, but I think can be worth it for the pretty spiraled edge that results.

method of wrapping blocking wire around edge
When tensioning filet lace, the goal is to square the lace. I just give it a visual check, but you could measure it if you are more of a perfectionist than I am.

side view of blocking wire wrapped around edge
It is very important to let the lace dry thoroughly in place before removing the blocking wires and pins. This takes longer than the “dry to the feel” test, because the fiber surface can be dry but the interior still holds moisture. Be patient. The time will depend on your climate. Rule of thumb to be safe and not lose the work you’ve done – 24 hours. But you might be able to get away with just overnight.
Step 5: Observe, Feel and Fondle, Measure, Decide
After the fabric is thoroughly dry, remove the wires and pins. The blocked lace should retain its undistorted shape.
Look at your results. Is it pleasing?
Feel your results. Is the hand of the fabric to your liking? Too dense? Too loose?
Measure the blocked area and cross-check it with gauge, and/or extrapolated final measurements. On target? Or too small/large? Since this is a scarf, gauge is not terribly critical. But if it were, this is the point at which to check that you are on course.
Based on your findings, decide whether it is ok to proceed. If there are doubts, reassess your options. Better to find out now than later when the article has been completed. Hopefully it is ok, and you will then have confidence and joy in your knitting as you proceed.
the blocked lace retains its undistorted shape
Other references on the HeartStrings FiberArts website
Blocking in Progress: Finishing as an in-process activity
Tips for Tension Blocking: Making blocking a pleasurable part of the knitting process
the blocked lace with spiral edge

 HeartStrings FiberArts
 Knitting Bits of Lace on Facebook
 Ravelry Store