We’re nearly done knitting the Pretty Awesome Yarn Pouch. I think you are really going to love seeing the spiral take form as you decrease for the bottom of the pouch. And then there’s just a bit more to do to finish the project.
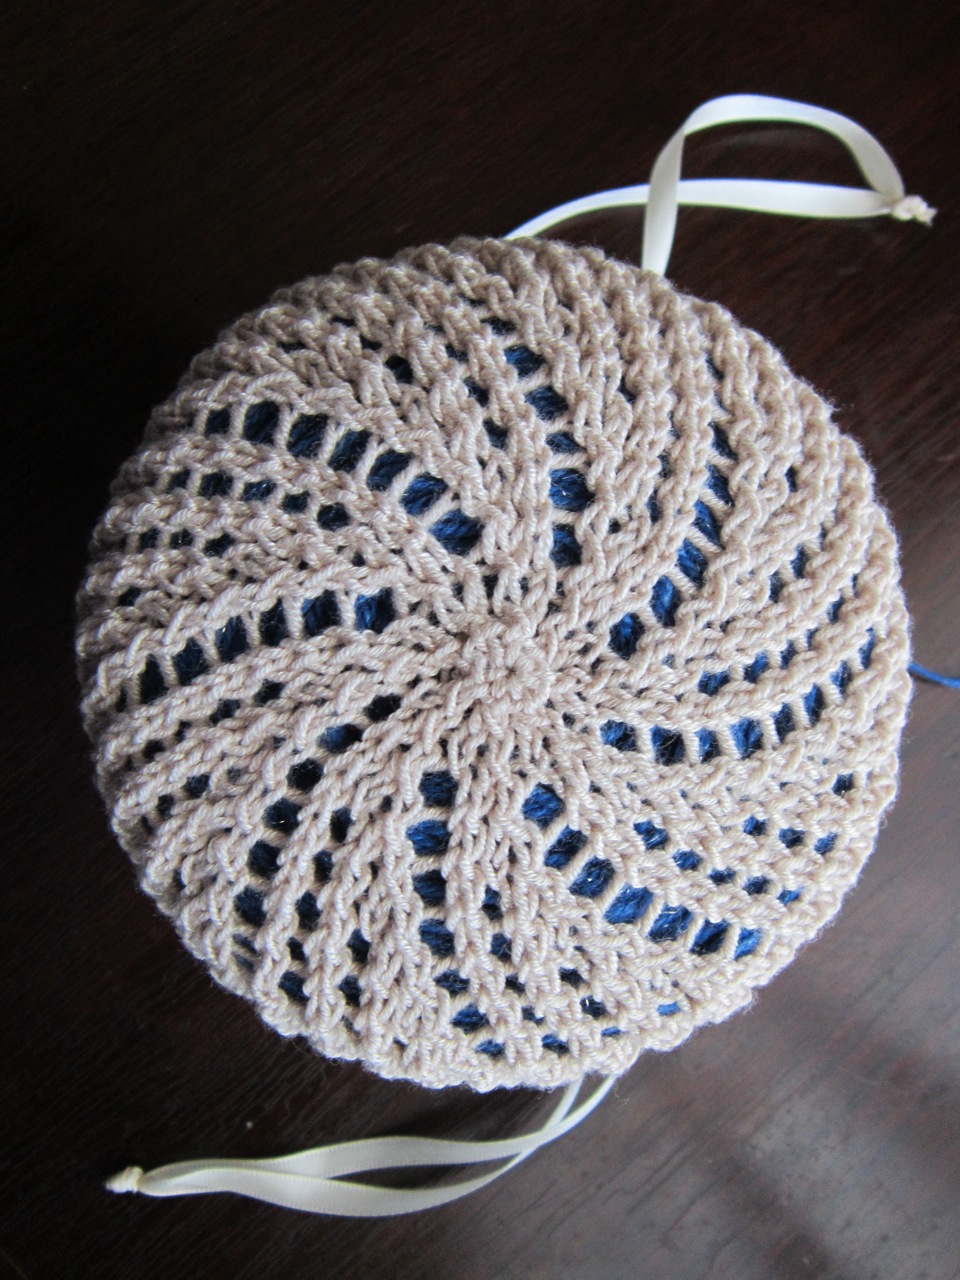
Spiral bottom of yarn pouch
At this point, you should be ready to start the Bottom of the Pouch. If you missed the previous articles leading up to this point or would like a re-fresher, you can read them here –
- Knitting the Lace Edging – Part 1
- Part 2 of Knitting the Lace Edging
- Knitting the Main Body of the Yarn Pouch
 8-Point Decrease
To form the bottom of the pouch, 8 stitches are decreased every other round. This rate of decrease produces a flat fabric that is good for accommodating the bottom of yarn cakes. Yet there is enough stretchiness in the stitch pattern to easily conform to the rounded shape of balls, too.
Marking the Decrease Sections
The 8 decreases are made equal distances apart. It’s helpful to use stitch markers or similar to mark the 8 points in the round where decreases will be made. To start with, that means the 80-stitch round is divided into 10-stitch sections.
Tip: When working on double point needles, 2 circulars, or 1 circular magic loop, arrange your stitches so that a decrease section does not split between needles/loops.
The Last Few Rounds
If using a single 16″ or smaller circular needle, switch to double point needles when there are too few stitches to go around the circular needle. (When I used a 16″ circular, I switched at the beginning of round 5.) If using 2 circulars or 1 circular with magic loop, you’ll just be able to continue all the way down to the last 8 stitches (4 stitches on each needle cable).
Gathering the Remaining Stitches
Before pulling the yarn tail through the remaining stitches, remove markers if you have not already done so.
Tip: You might want to pull the yarn tail through the remaining stitches a second time, just to help keep the center tidy.
Snug up the yarn tail, then bring it to the WS and secure invisibly.
Blocking
Soak the yarn pouch completely. Then lay it out flat on a drying board with the lace edging turned up (or down, depending on your point of view) at the first set of eyelets for the main body of the pouch. At this stage, it will look like a small hat (and would probably make a cute one, too?).

I suggest just finger blocking the edging to make it tidy and open up the lace pattern nicely, but leave the rest of the bag un-tensioned (so that the springiness of the stitch pattern is not lost).
Drawstrings
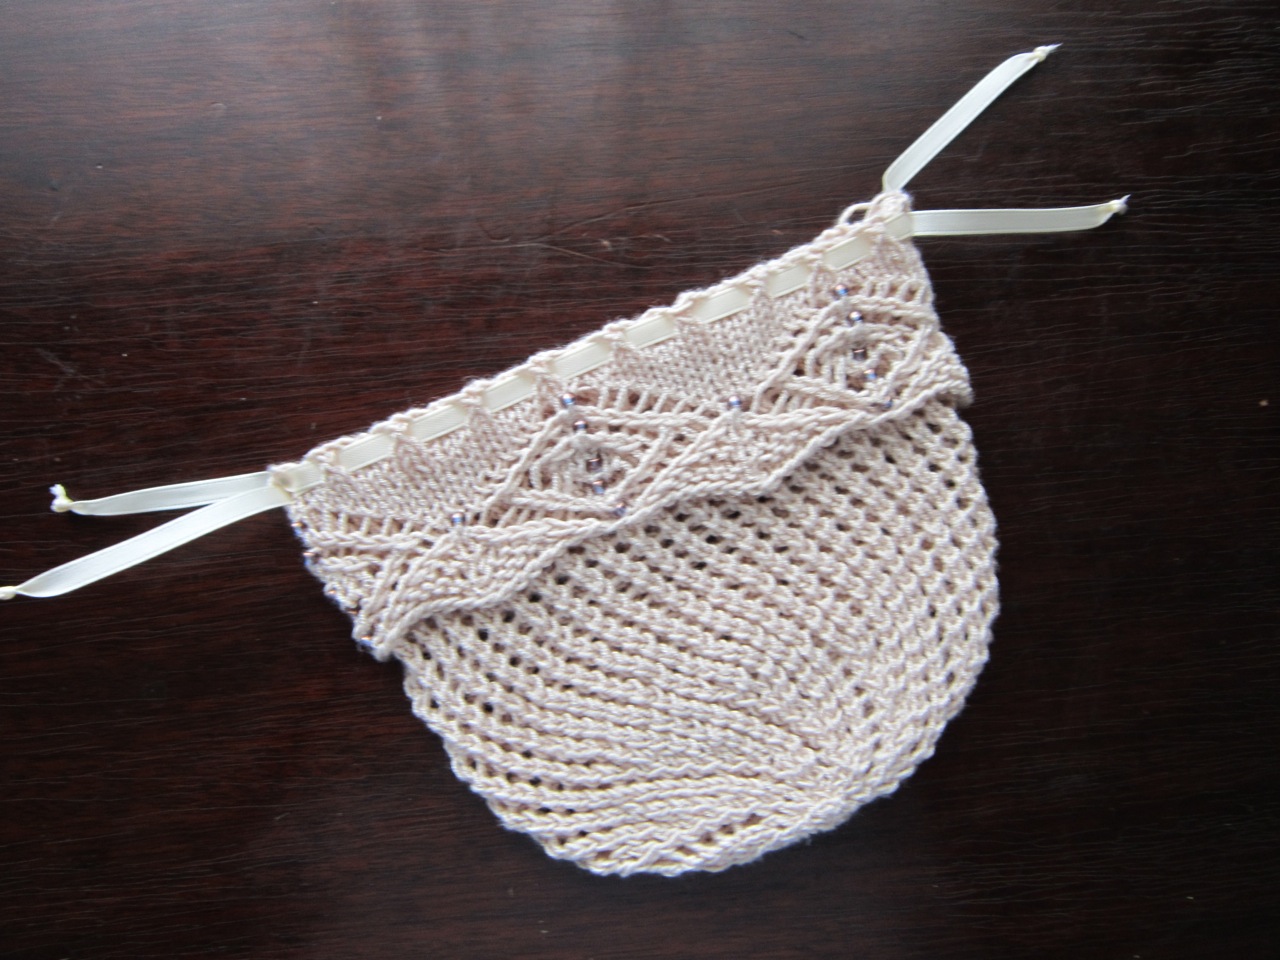

For the drawstrings, you can use narrow ribbon as I did, or any cording you have on hand. You could even make twisted cords from the same yarn you used for the project if you have enough left over.
Weave one of the drawstrings in and out of the top round of eyelets; you want to bring the drawstring all the way around to where you started.
Starting halfway around the top edge of the pouch, do the same with the other drawstring. You will end up going through all the eyelets a second time, except that the ends of the second drawstring will halfway around the top of the pouch.
Tie the ends of each drawstring together and you’re done! To use, just place your center pull ball or cake of yarn inside the pouch, leaving the yarn to come out of the top, and cinch up the drawstrings. Isn’t it pretty awesome?


 HeartStrings FiberArts
 Knitting Bits of Lace on Facebook
 Ravelry Store
Pingback: Zooming Along on the Center Area | Knit HeartStrings Learn-and-Knit-Alongs