More complex, wider edgings are often just combinations of portions of smaller edging patterns. The narrow “heading” pattern usually present at the straight edge is one that is easily substituted to meet your needs for function and design.
By function, I mean things like –
- is the heading to be decorative only, or will it additionally be used for another purpose such as insertion of a gathering ribbon?
- what kind of fabric/material is the lace edging going to be attached to?
- what kind of everyday wear is the article and its lace edging going to subjected to?
For a review of the portion of the lace edging I am referring to as the “heading”, look at the Basic Anatomy of Knitted Lace Edging schematic I introduced in the Bit-size Tutorial Knitted Lace Edgings: a working definition and basic characteristics about 6 weeks ago. If you are just joining in now, please read that tutorial first, as I will be referring to concepts introduced there.
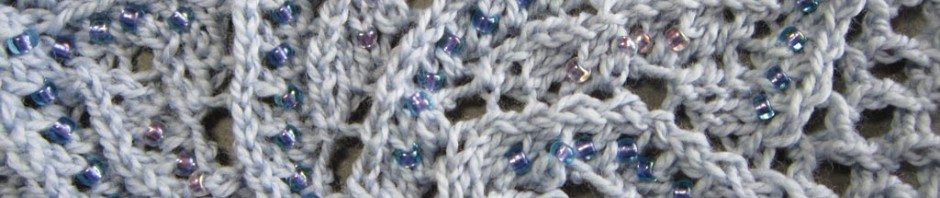
The Three Eyelets Sachet that you have been working on this month has a 4-stitch header with a “ladder” of eyelets. This particular header is ideal for weaving a decorative ribbon through and gathering (as for our sachet). Additionally, the outermost stitch of the straight edge is a chain stitch selvedge (more about this in a future post).

Header of lace ladder eyelets along straight edge of Three Eyelets Lace Edging
Here are the “building block” instructions you can substitute in any lace edging pattern where you want this look/function:
- For rows beginning at the straight edge, the first 4 sts are: sl 1 pwise wyif, yo, p2tog, followed by a knit stitch …
- For the return rows, they always end with these 4 sts: … a knit stitch, followed by yo, p2tog, k1.
If you’ve been following along with other lace edging patterns we’ve been doing, you can see that each has had a slightly different header pattern. Over the coming weeks, I will help you isolate the building block instructions for each header, and some pointers on its function and design.

 HeartStrings FiberArts
 Knitting Bits of Lace on Facebook
 Ravelry Store
Pingback: How You Slip Does Matter - The Chain Stitch Selvedge | Knit HeartStrings