no-sew minimalist seam using simple half-hitch cast on and 3-needle bind off
After the knitting portion of Irish Coffee Cozy has been completed, we are now going to join the strip of beaded garter stitch fabric into a tube.
Rather than binding off the knitting, then joining with the minimalist seaming sewn method as we did in last year’s Beading Hearts Friendship Bracelet, I’m going to cover the steps to do a no-sew minimalist seam using 3-needle bind off.
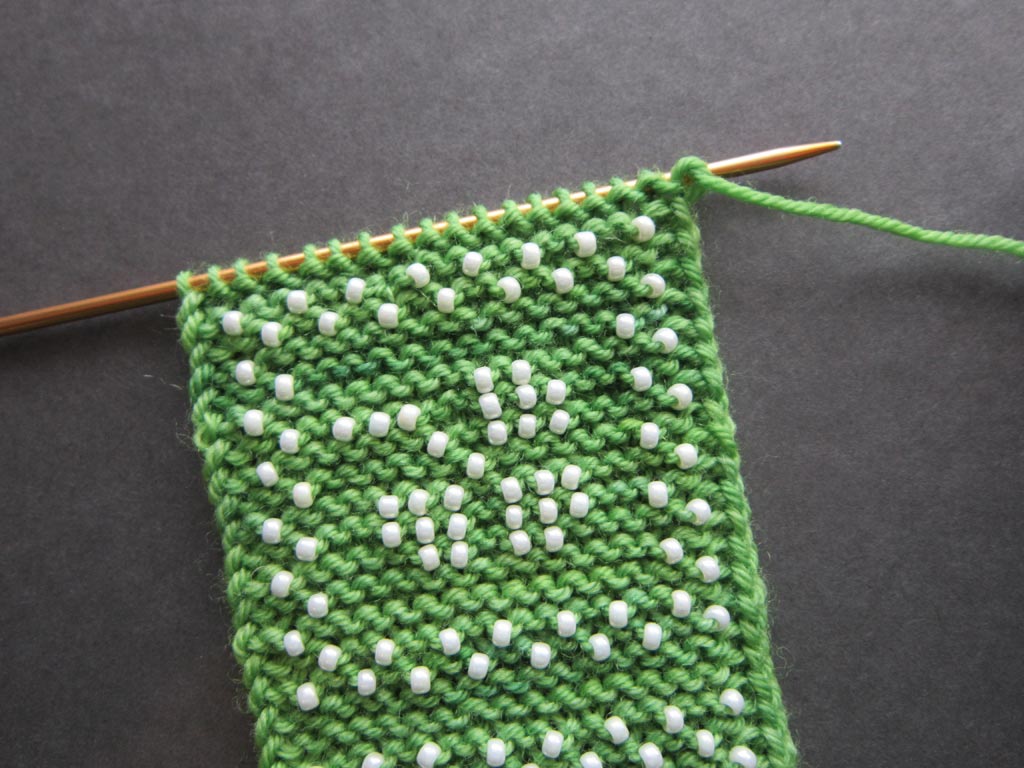
The knitting portion of the project has been completed.
Overview Comparison of Sewn and No-Sew Methods
Because this no-sew method uses the live stitches rather than a bound off edge, the seam is even less bulky than the minimalist seaming sewn method. But otherwise, they are similar in their approach:
- Both use the simple half-hitch cast on method to minimize seam bulk when later joining the strip of knitted fabric.
- The first knitted row is a WS row. This sets up the first part of the sequence of “ridges” so that when the cast on is joined to the end of the fabric, there will be a matching “valley” between the ridge of the first row of knitting and the last row of knitting when viewed from the RS.
- The last row knitted is a WS row. This sets up the 2nd part of the sequence of ridges so that when the cast on is joined to the end of the fabric, there will be a matching valley.
In both cases, the fabric as seen on the RS will have virtually an invisible seam line. Even though the WS will have some extra bulk at the seam line, it will be minimal. Not a thing to really cause any problem since this beaded garter stitch tube has a definite RS (i.e. the side that the beads show up on); the WS is not intended to ever be seen when used anyway.
Note: If you adapted to start with long tail cast on instead of simple half-hitch cast on, as discussed in Sometimes It’s the Simple Things, then one end of the yarn has already knit on a row of WS stitches (while the other end acts like the simple half-hitch cast on). That is why I instructed you to start with the RS row 2 instead of the WS row 1.
No-sew minimalist seam using a combination of simple half-hitch cast on (or long tail cast on) + 3-needle bind off
After completing the knitted portion of the project, just leave the stitches on the needle and do not cut the yarn.
Stitch counts used below relate to the Irish Coffee Cozy, but you can use this method for any number of stitches on other projects.
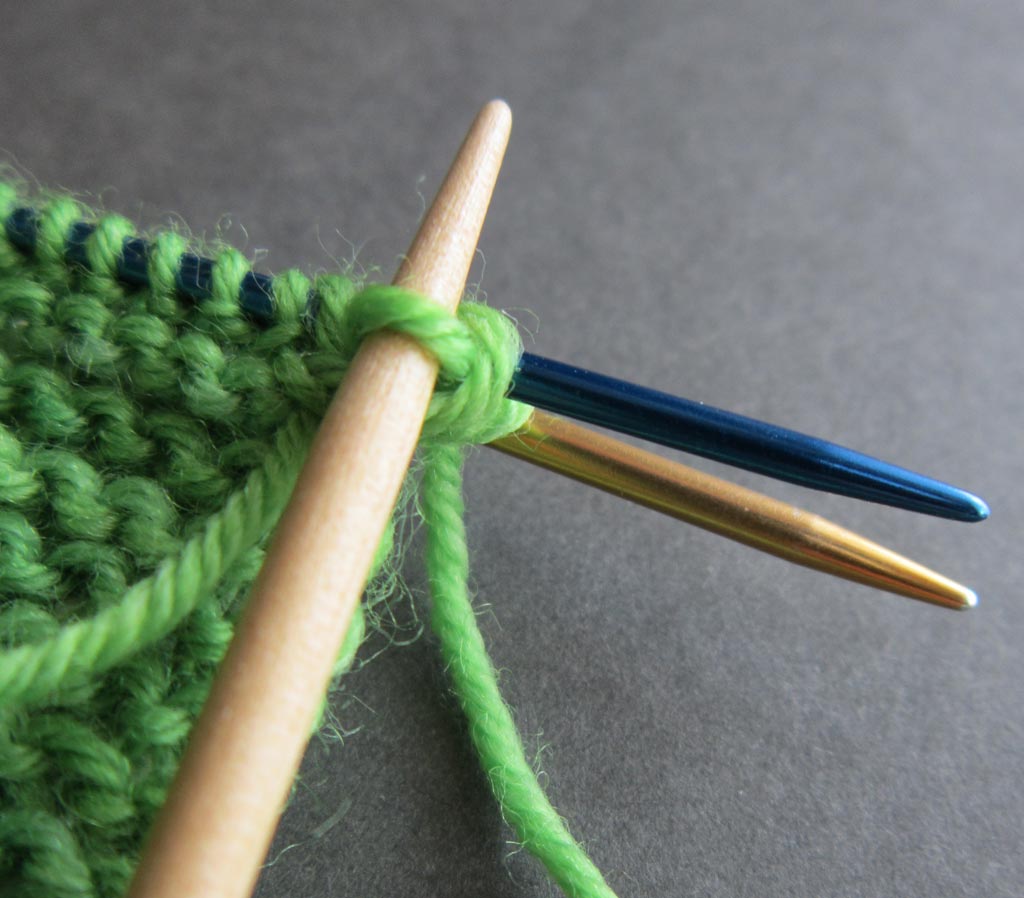
Step 1: With cast on edge upwards and beaded side facing, use your other loose needle to pick up each loop along the cast on edge. The number of loops you can pick up between stitches (17) will actually be one less than the original number of stitches you casted on (18). So when you get to the end with the cast on tail, just dip down into the chain selvedge stitch there and pick up the side of the stitch.

Pick up loops along cast on edge + side of selvedge stitch = 18 total stitches on needle
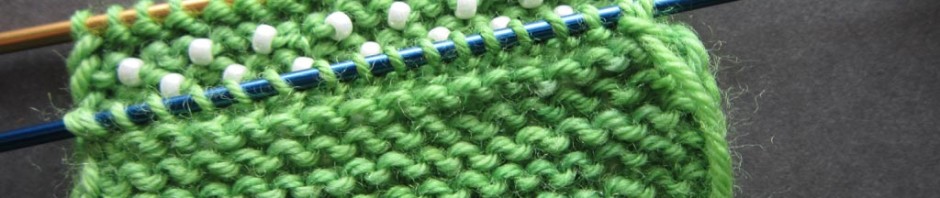
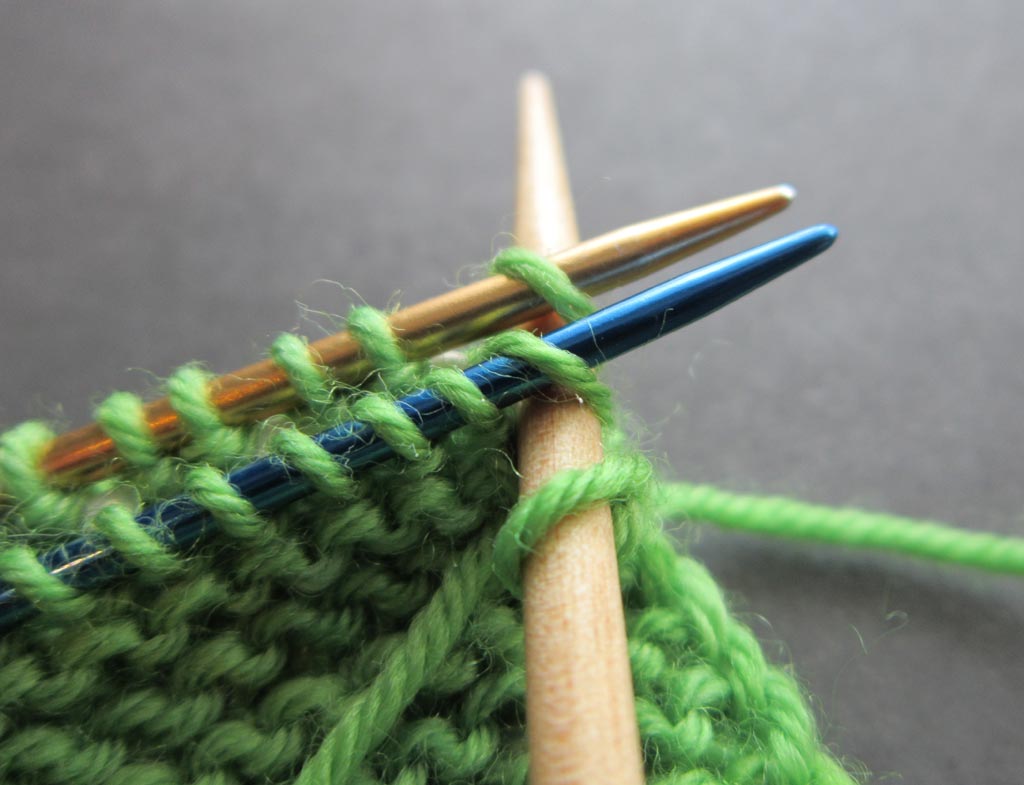
Step 2: Hold beaded sides together and cast on edge to front. Bring the cast on edge needle up to the other needle so that the needles are parallel and close together.

beaded sides together and cast on edge to front
Hold needles parallel
Note: I’ve used 2 different color needles in these photos just so you can clearly differentiate the live stitches at the end of the knitting (gold color needle) and the picked up loops along cast on edge (blue needle).
Step 3: Work 3-needle bind off as follows:
Using larger size needle as your working needle, insert needle as if to knit through both the stitch on front needle and stitch on back needle, then knit these stitches together.

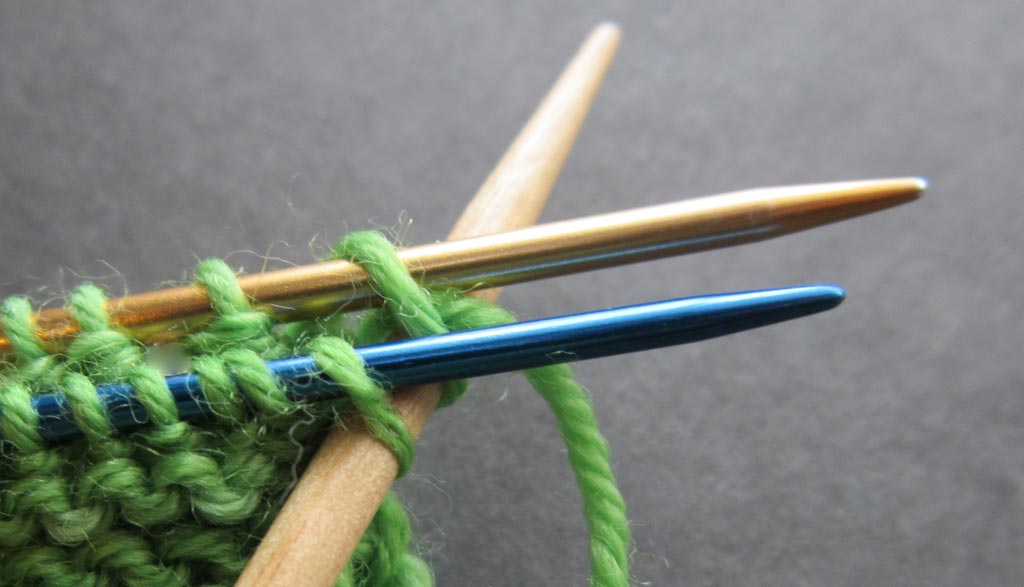

The first completed k2tog stitch
* k2tog front and back needle stitches again, pass previously completed stitch on right-hand needle over the k2tog stitch just made. Repeat from * to end of row.

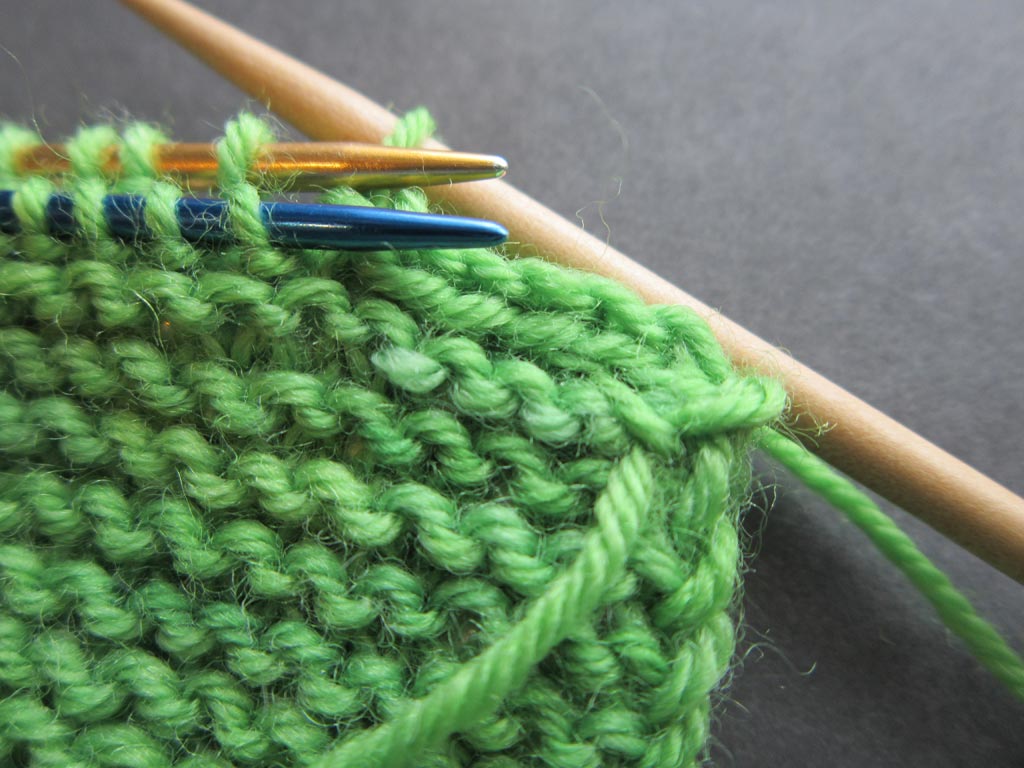

All stitches have been joined and only the loop from last stitch of 3-needle bind off remains
Step 4: Cut yarn and pull tail out of remaining loop to secure against unraveling.
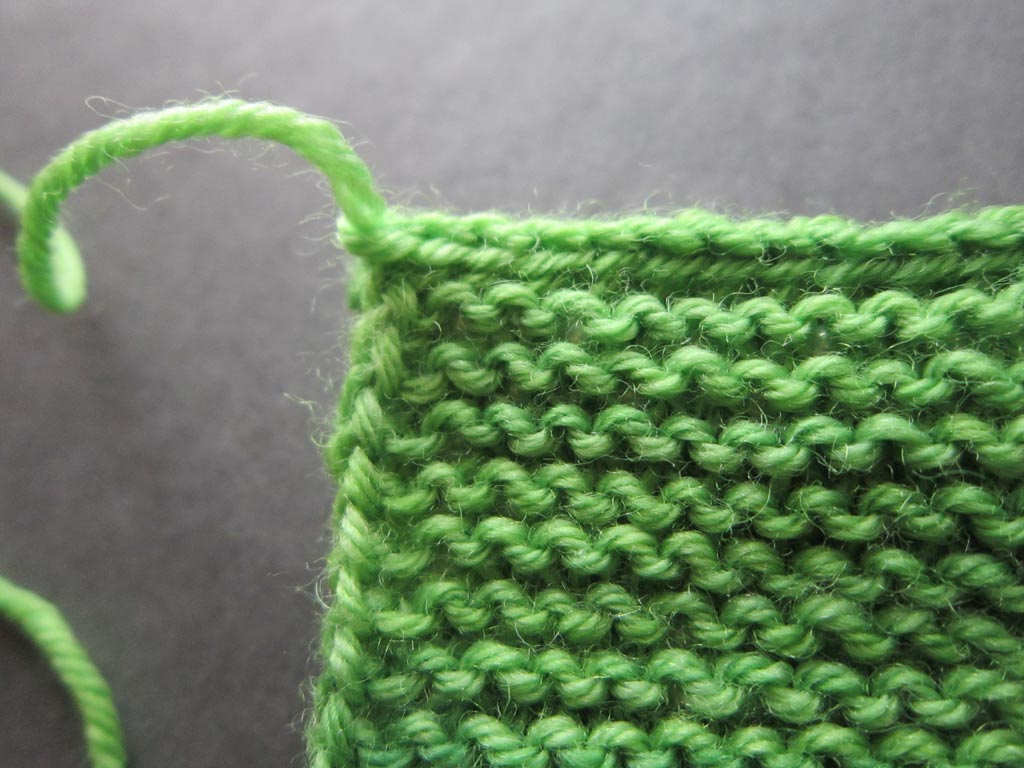
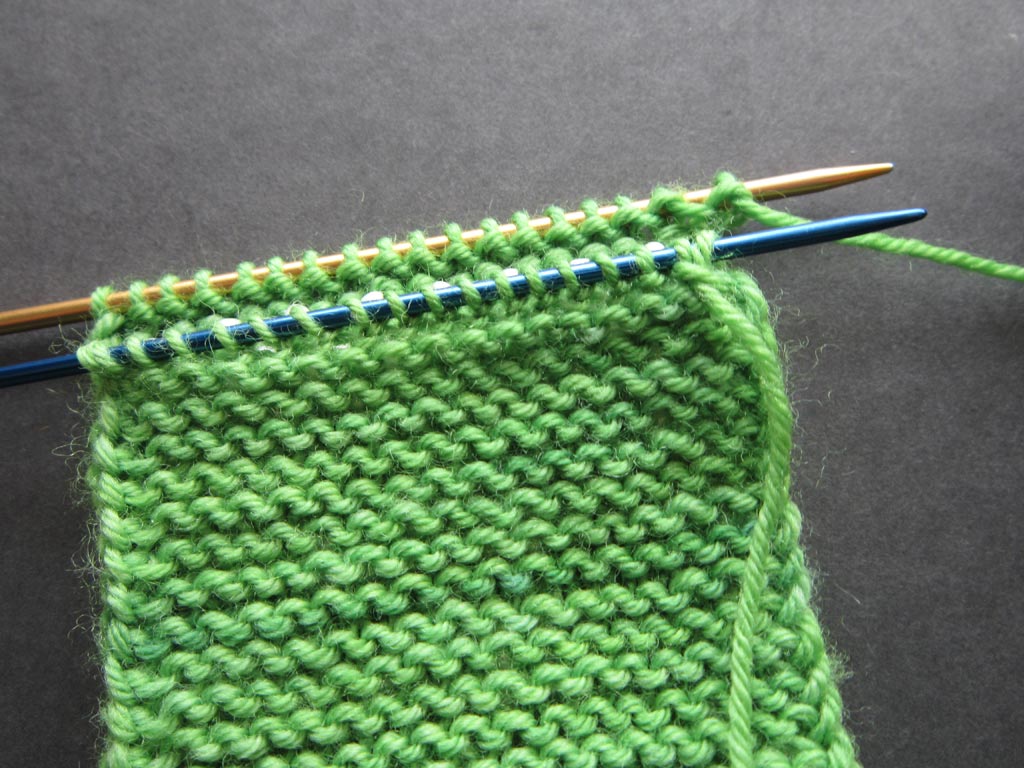
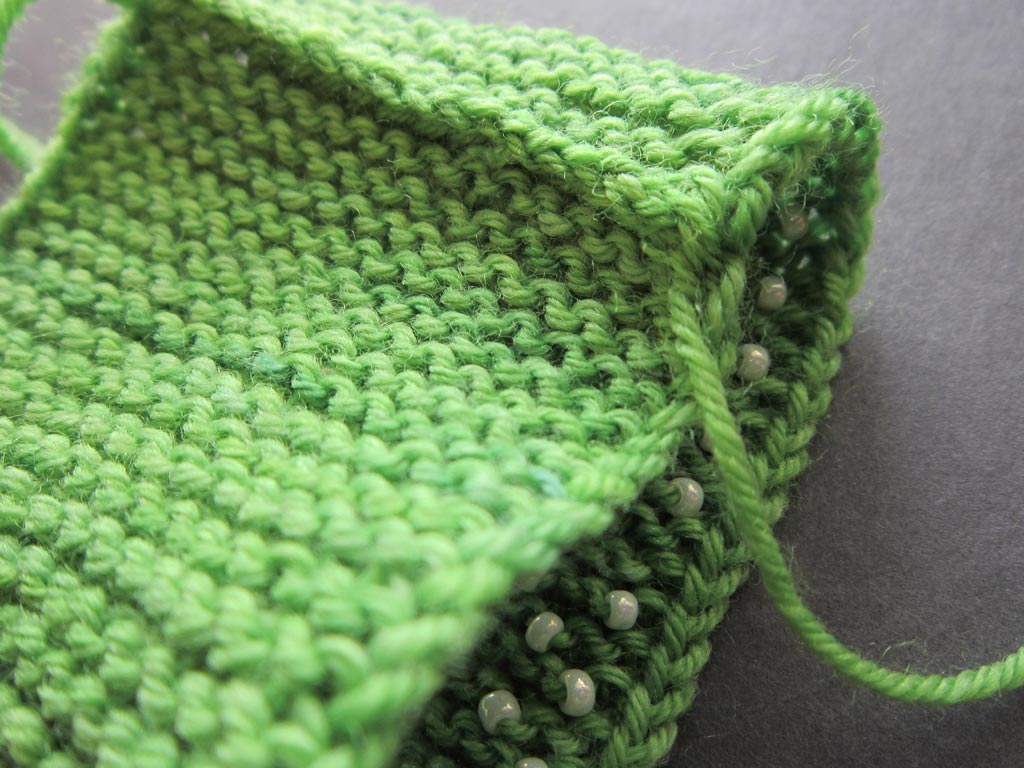
The completed join
Here’s the completed seam join (with a peek at the beaded side).
Step 5: Weave in ends invisibly on WS.
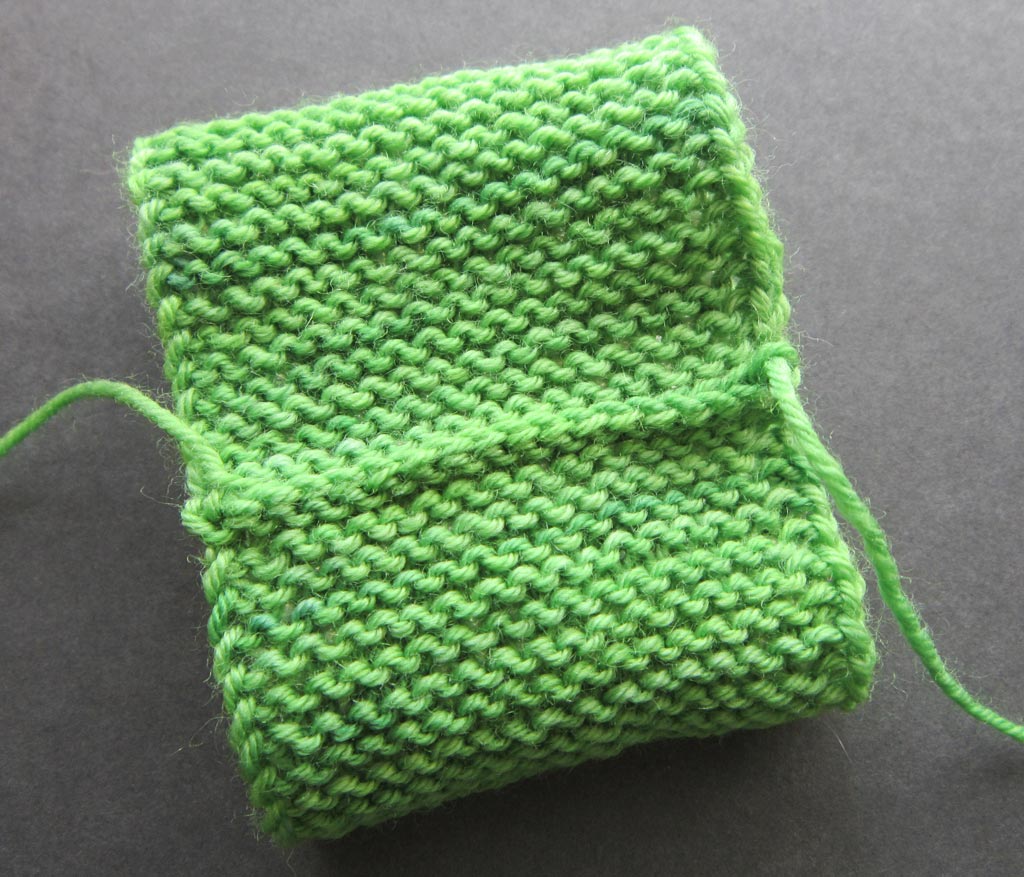
Completed seam with ends to be woven in
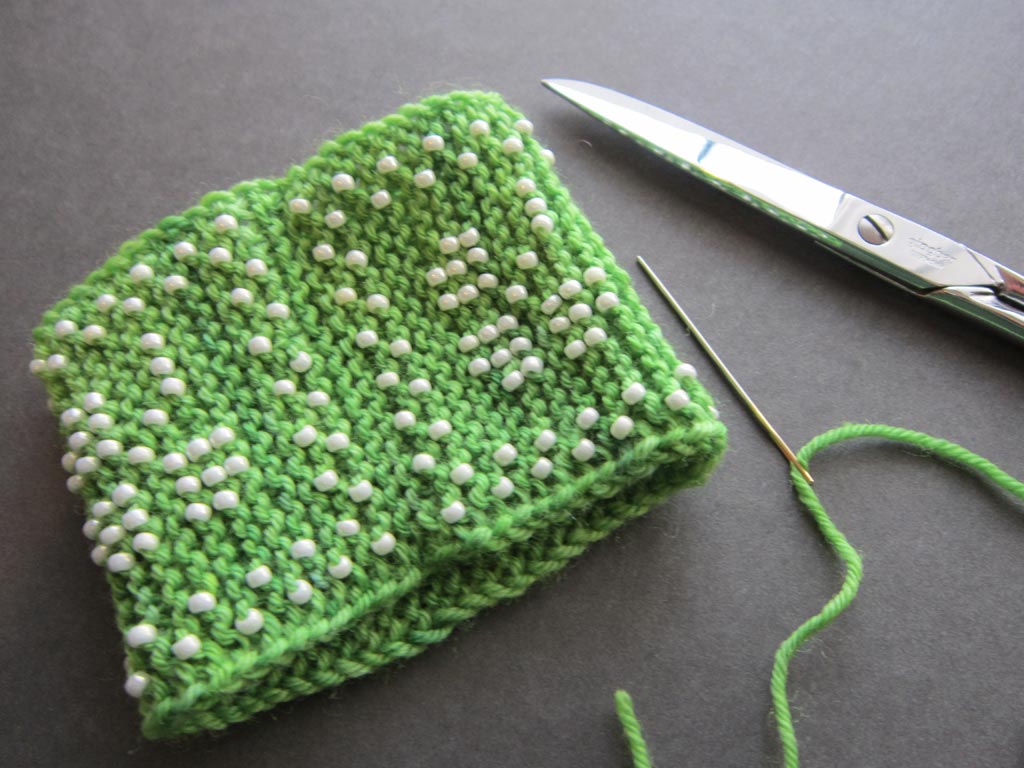
Completed cozy with ends woven in

Close-up of seam line
For all practical purposes, the seam is invisible on the RS. Also, the design integrity is maintained because there are exactly 2 ridges between the framed shamrock motifs just as in the areas that were knitted. What do you think?
I hope you enjoy using this no-sew version of minimalist seaming for your Irish Coffee Cozy and possibly other similar projects in the future.

 HeartStrings FiberArts
 Knitting Bits of Lace on Facebook
 Ravelry Store
The tips about starting with a half hitch cast on and a WS row are great. However, on step 2 you say to put the wrong sides together, but the photo shows the right sides together. I think you mean the right sides together.
Oh my, yes I meant to say “Hold beaded sides together”.
Thanks for catching that!