
oh-oh — not a knot!
Suppose you have strung beads on your project yarn and are merrily knitting along on your beaded pattern. Then, you encounter a knot or other fault in the yarn which does not allow you to continue to push the beads down along the yarn. Oh, no! What to do?
I’ll show you step-by-step how to transfer beads from your project yarn to a temporary thread so you don’t have to re-string all the beads. Once the beads are on the temporary string, you can re-transfer them back to your project yarn using the same technique you learned in Transferring Pre-strung Beads so you can proceed again with your knitting.
What to do if you run into a knot so you don’t have to re-string beads
First, make sure it actually is a knot rather than just a kink or slightly larger area in the yarn that can be dealt with by a bit of straightening. No use making things more complicated than they need to be. Sometimes there is just a a bit of extra thickness in the yarn because of a bump of “fuzz” which can be removed without damaging the integrity of the yarn. Then you can proceed normally.
Well, one can hope that the knot encounter is a false alarm. Failing the test above, let’s proceed with the next steps.
Here’s an obvious knot I made for demonstration purposes where there is no way the bead holes are large enough to pass over.
Encountering a knot
Tools and Supplies Needed
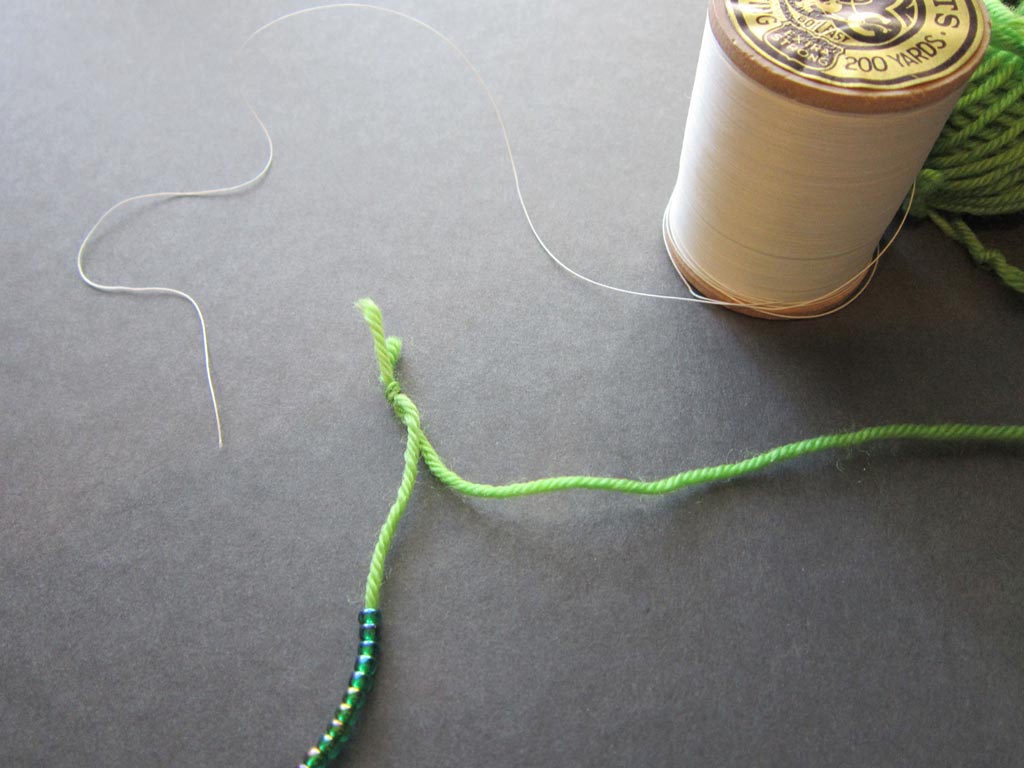
For cutting out the knot and transferring the already-strung beads to a temporary thread, you will need only 2 things:
- Scissors
- Some thin, yet strong and non-slippery thread. e.g. cotton or cotton-blend quilting thread
Chocolate or beverage of your choice is optional. Overcoming the knot isn’t really a difficult task, but given it might be your first time, some extra fortification might be comforting.
Cut Out the Knot
Just scoot your beads away from the knot (several inches if possible). Then cut the knot with scissors.
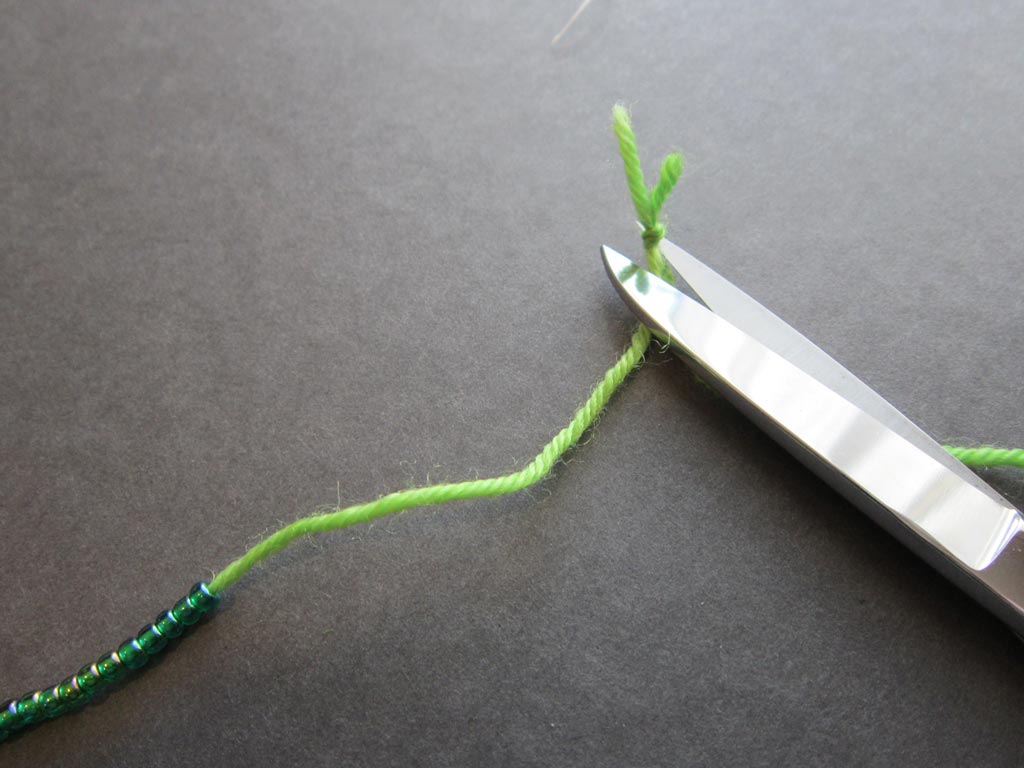
Cut the knot
Discard the knot. Set aside the end that is attached to your ball of yarn awaiting to be knit (i.e. the end without beads). For a while, you’ll only be working with the end of yarn with the beads strung on it.
The Weaver’s Knot
It might seem incongruous that I am going to now have you make another knot.
What? you say! You just had me cut out one knot and now I am going to make another?
Well, yes. But this is a special knot. 🙂 You see, it is going to allow you to tie on the quilting thread with the barest added thickness, and allow you to transfer the beads to the thread so you can re-transfer them back to the yarn awaiting at the ball end. This knot is called a weaver’s knot. The version I am going to show you here is very compact, yet strong and non-slipping when you follow the steps. I am breaking it down to several steps, but it actually can be made quite fast with just a bit of practice.
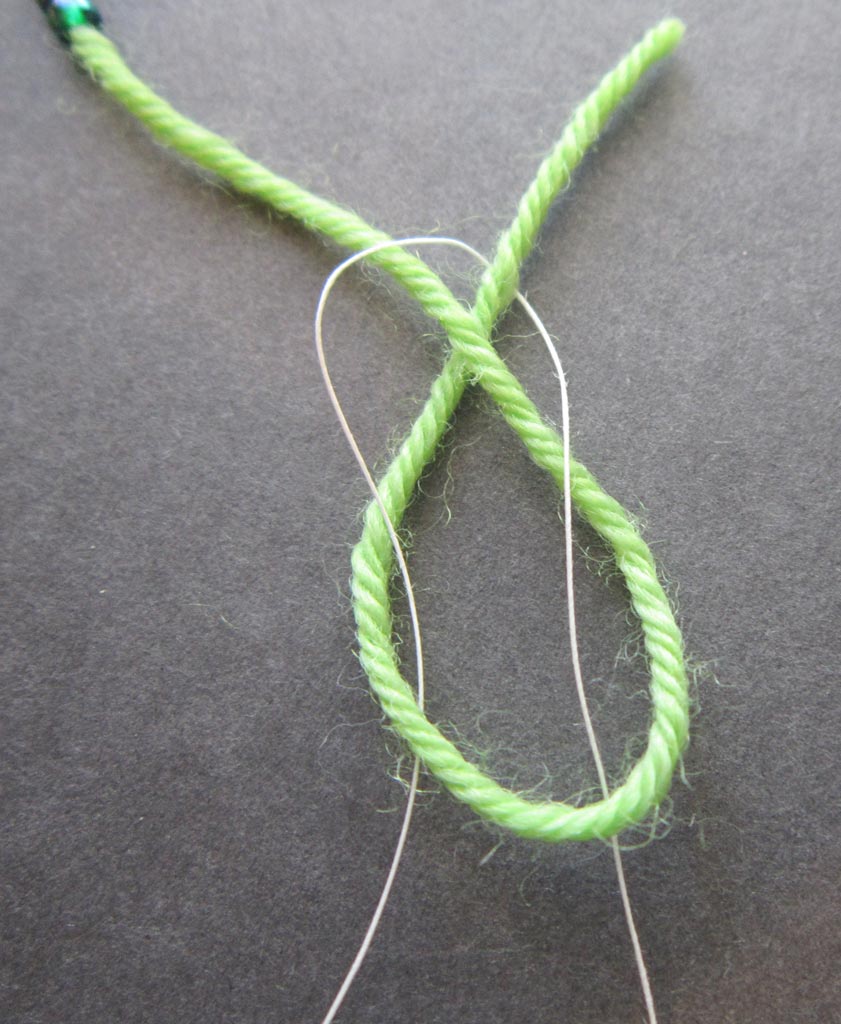
Step 1: Using the yarn with beads strung on it, make a loop with the cut tail end positioned underneath.
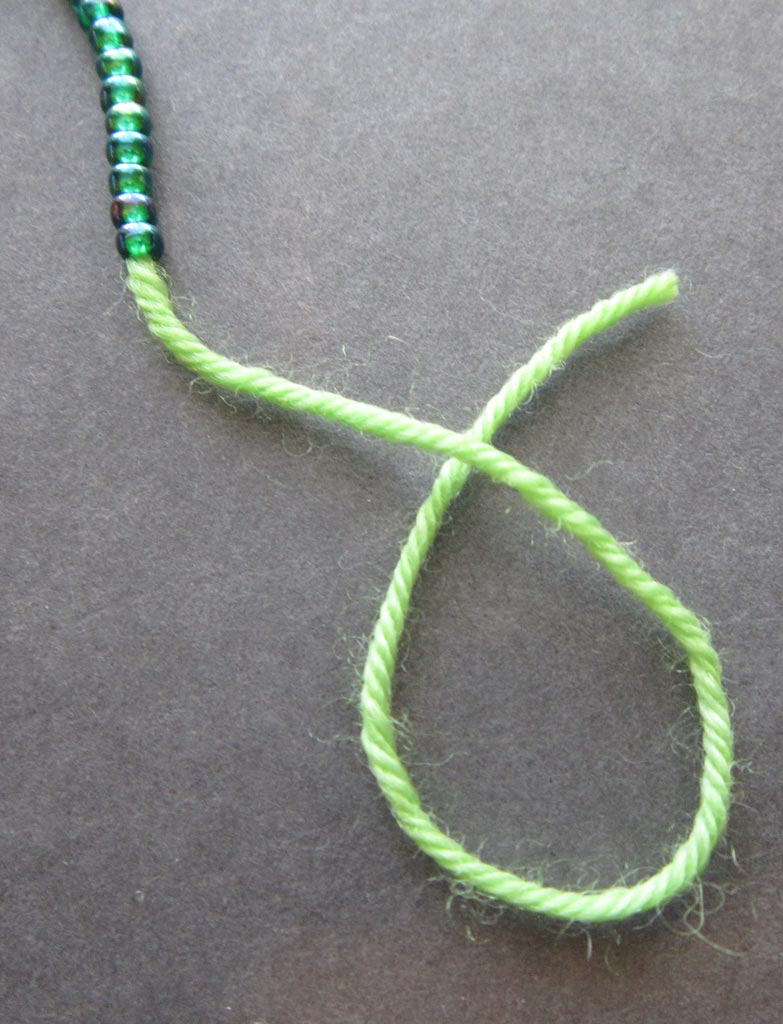
Loop cut tail end under
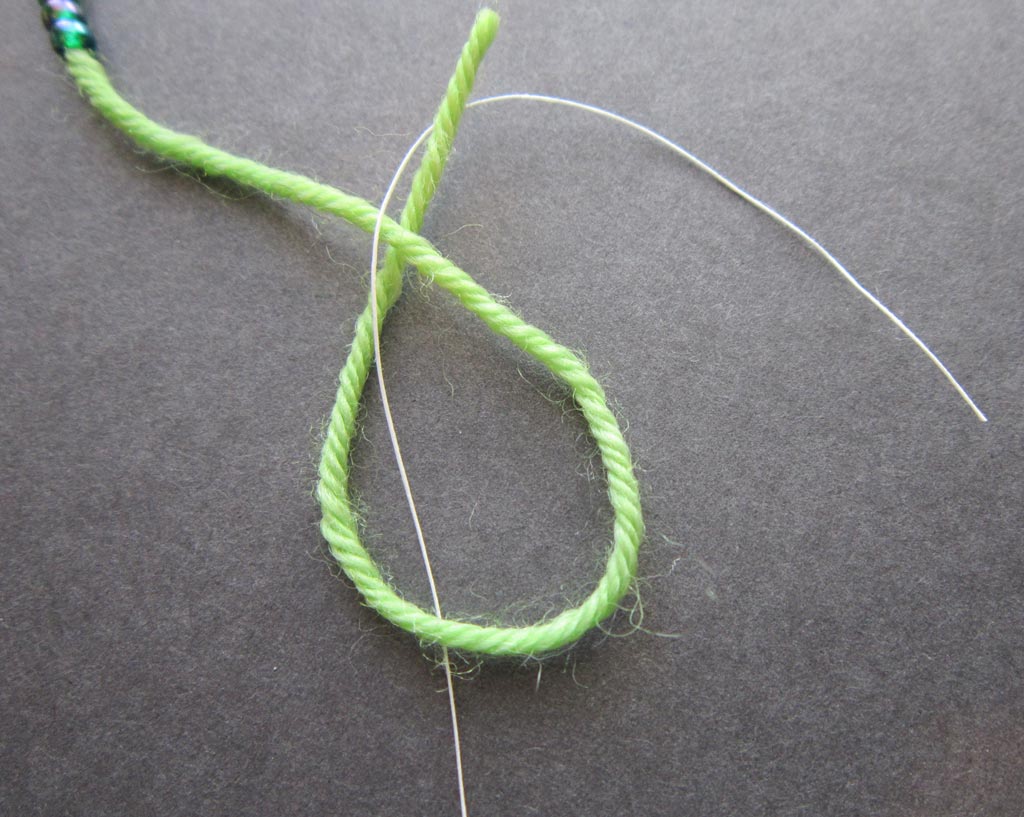
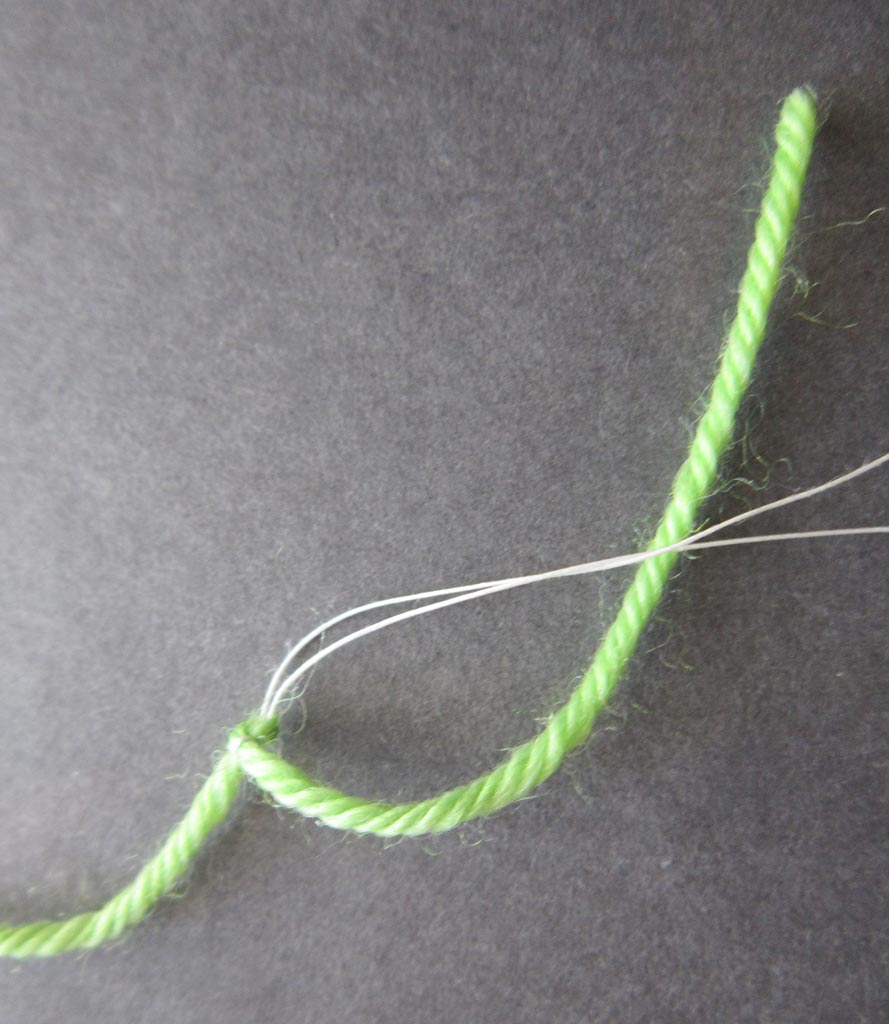
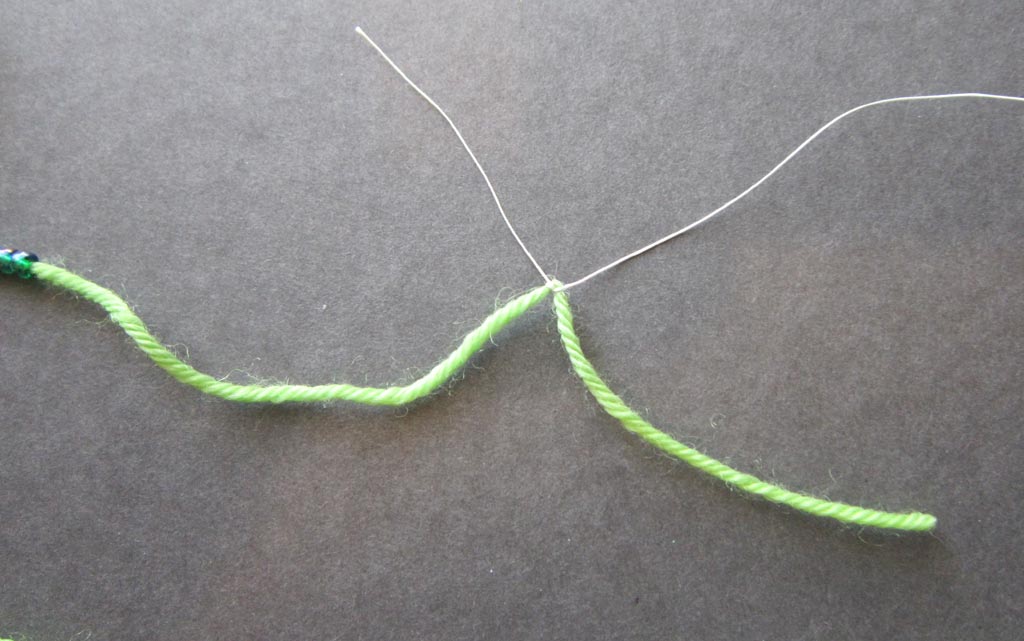
Step 2: Insert the quilting thread up through the loop from underneath, then pull it upwards and over the yarn tail end.

Pull thread up through loop and over the tail
Step 3: Bring the thread to the back around the yarn tail clockwise …
Thread under tail end of loop
Step 4: … then down through the hole in the yarn loop.
Thread down hole in loop
Step 5: Tighten the knot. Start by pulling the 2 strands of thread away from the yarn loop.
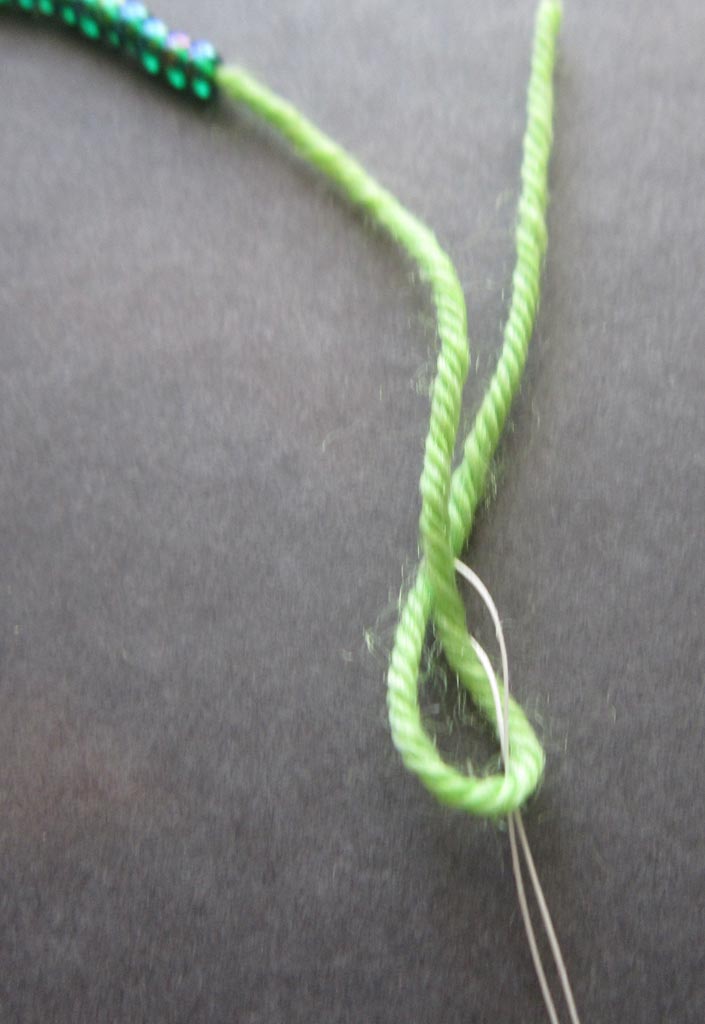
Start pulling the knot snug
Knot almost pulled snug
Pull up on thread ends, then tighten the knot further by pulling the 2 ends of thread in opposing directions. Test that the knot does not slip; if it does, tighten more.
Pull up on thread ends
Give the thread ends an extra tug in opposing directions
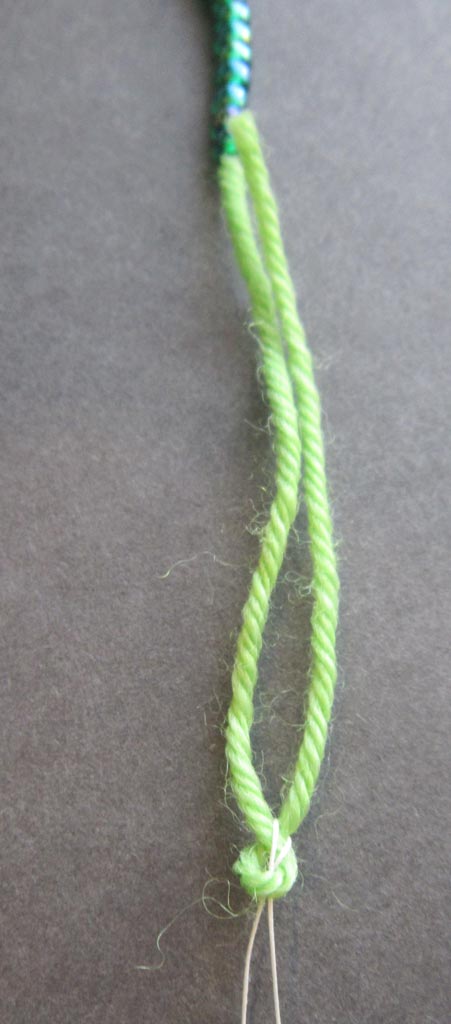
The completed Weaver’s Knot is compact and should look similar to this.
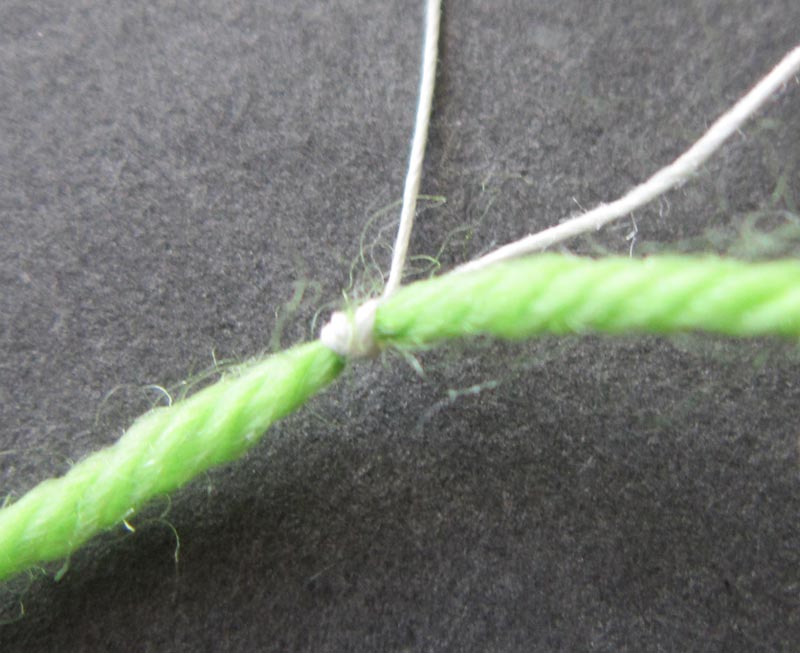
Weavers Knot completed
Transferring Beads to the Temporary Thread
Now you are ready to slide the beads off your yarn onto the temporary thread. Test out a few beads just to make sure that the knot is holding.
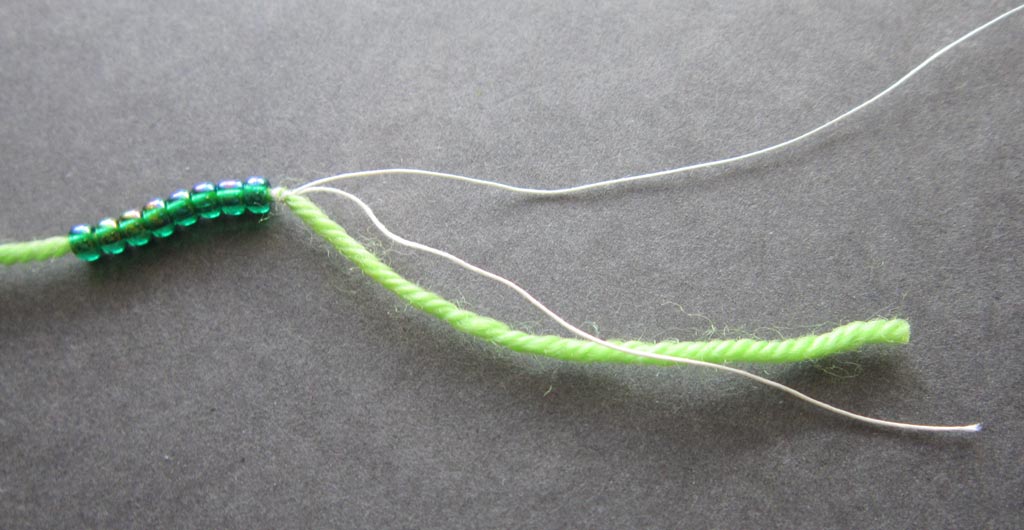
Push some beads up to the Weaver’s Knot
Push beads over the knot
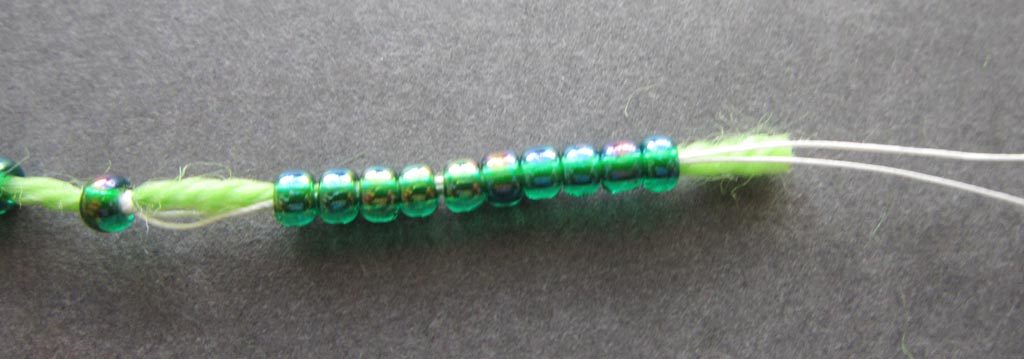
Then proceed to slide all beads off the yarn to the temporary thread.
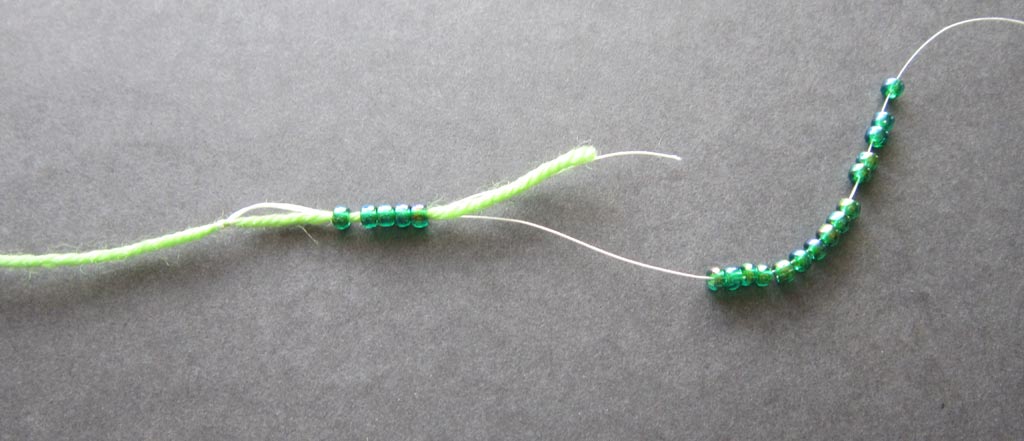
Push beads off the yarn onto the temporary thread
Proceeding with Your Knitting
Once the beads are on the temporary thread, you can cut the Weaver’s Knot.
Then using the same technique in Transferring Pre-strung Beads, re-transfer the beads to the other awaiting end of yarn attached to the yarn ball. After the beads are back on the yarn, proceed with your knitting. You’ll have 2 extra yarn ends to weave in later because of cutting out the knot, but at least you have saved the time to re-string the beads.

 HeartStrings FiberArts
 Knitting Bits of Lace on Facebook
 Ravelry Store
Wow, Jackie! You are a whiz at making what looks complicated initially really clear! Great pictures and instructions – I feel like I could actually do this now. Thanks so much for the tutorial! By the way, I’ve shared it with my fisherman-husband, and he was happy to find a cool new knot that he can use! ^_^