
Welcome back for the continuation of the photo tutorial series on the two triple decreases used in the Elegantly Simple feather and fan Shetland lace stitch pattern used in this month’s KAL projects.
Like the 3\ left slanting triple decrease, the /3 right slanting triple decrease produces an embossed, sculpted line in the Elegantly Simple stitch pattern. Together, these decreases beautifully mirror each other for symmetry, giving a delicate balance to the design. To achieve that symmetry, the right slanting counterpart does require a little more stitch maneuvering, however.

When first reading the step-by-step instructions in the Abbreviations section of the Elegantly Simple Baby Blanket pattern, making the /3 right slanting triple decrease might seem complicated to do because of moving stitches back and forth on the needles. But it again is simply made up of stitch maneuvers you already know how to do.
If you are a visual person, let the following photos help you see things broken down into bit-sized steps.
The /3 Abbreviation
/3 is used as the symbolic abbreviation in my instructions as a reminder that you are decreasing 3 stitches and the resulting stitch is right-slanting.
Another way you could see this abbreviated is: sssk-pnso; i.e. like ssk-pnso except with a sssk instead of ssk. pnso is the abbreviation for “pass next stitch over”.
You’ll be working over a total of 4 stitches to decrease down to 1 stitch.
Step-by-step to make right slanting triple decrease
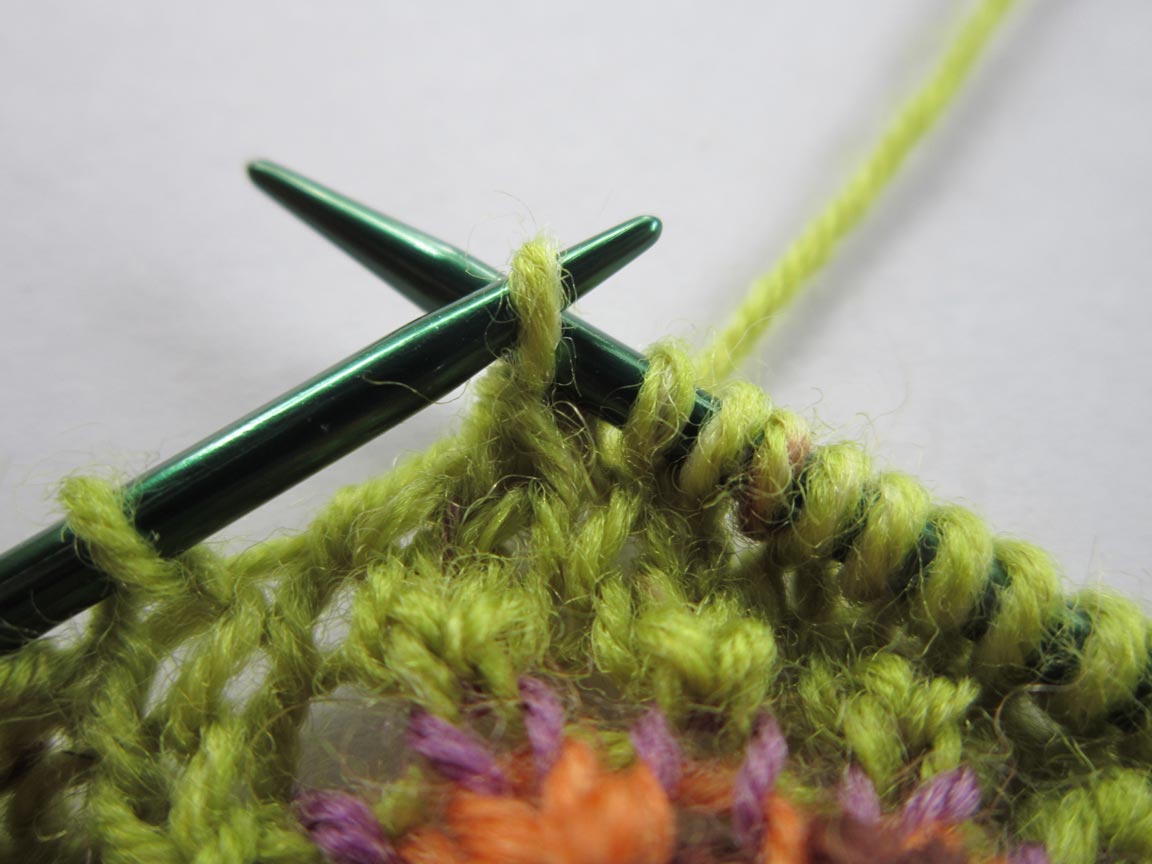
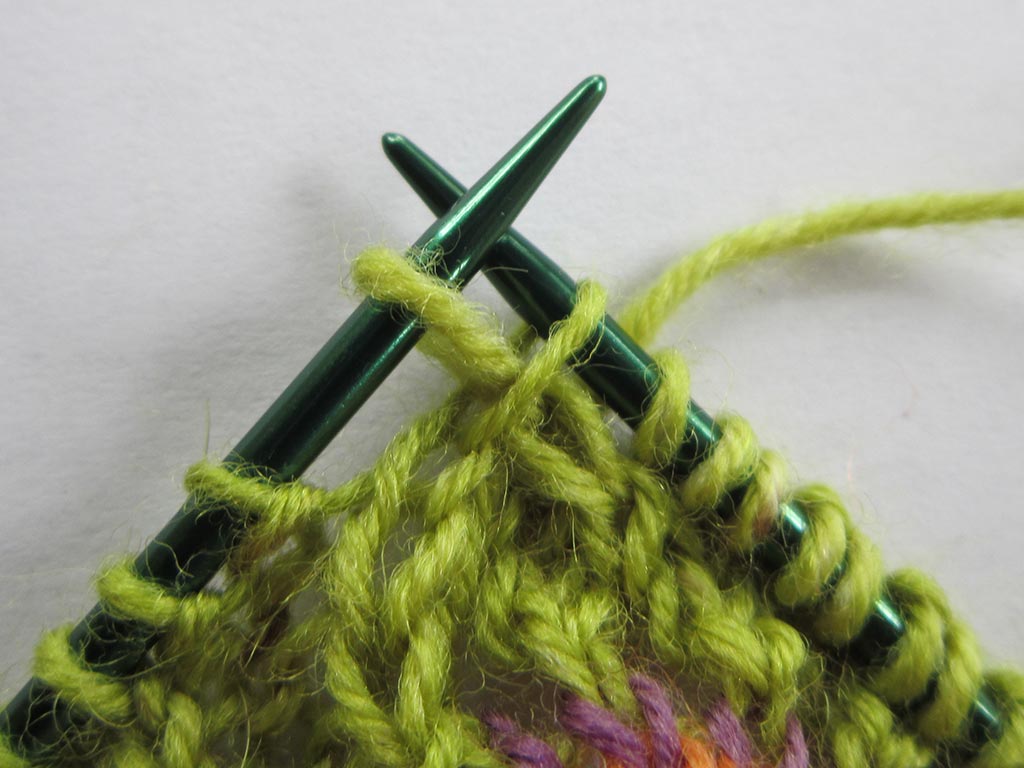
Since a yarn over precedes the right slanting triple decrease in this Shetland stitch pattern, your yarn will be forward of the right-hand needle to begin with.

yarn is forward for yo before starting to make the decrease
1. Work a sssk.
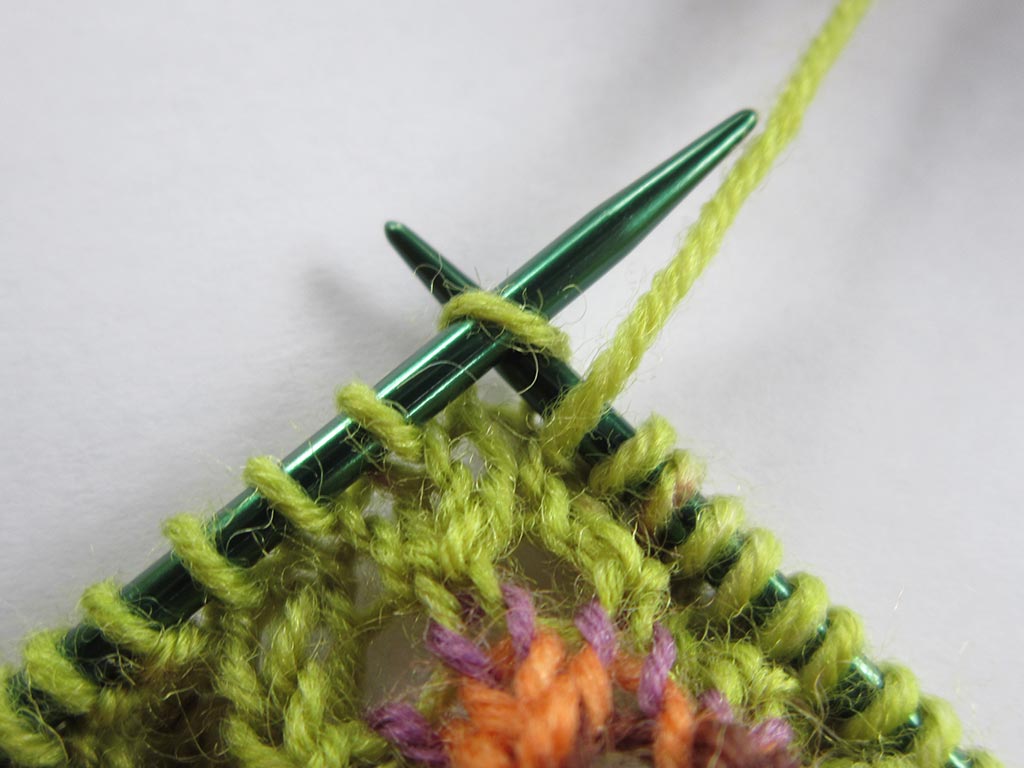
slip 1 stitch knitwise
slip 2 more stitches knitwise in the same way
insert left-hand needle left to right into the 3 slipped stitches

wrap yarn around right-hand needle counter clockwise
pull yarn through all 3 stitches
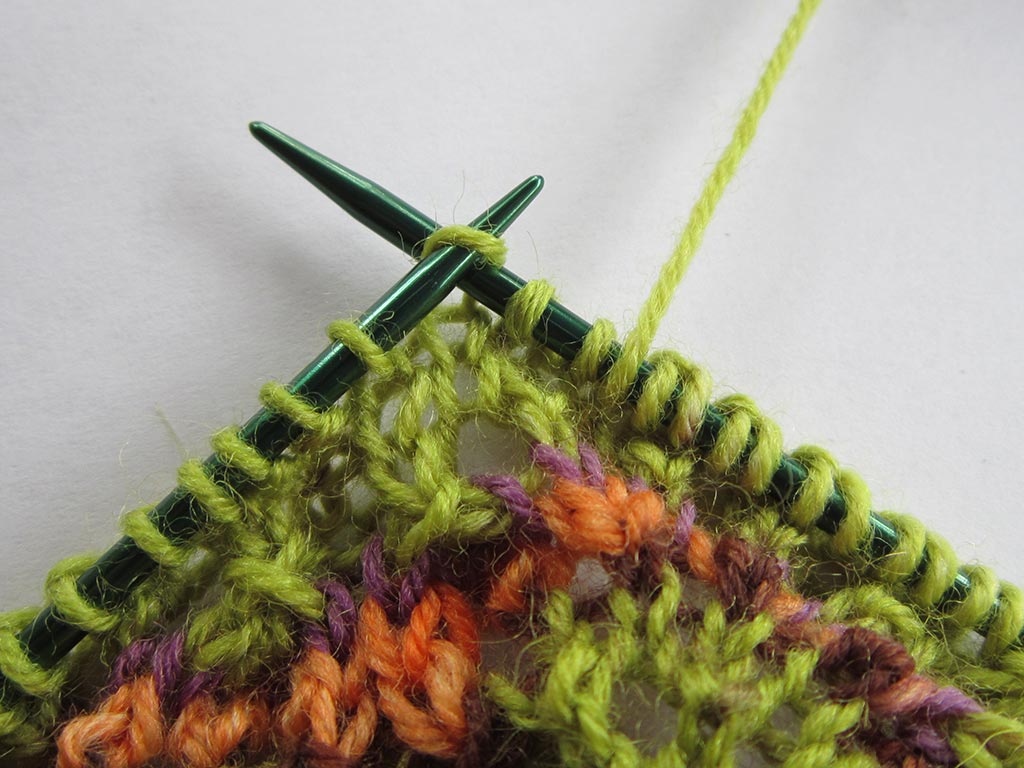
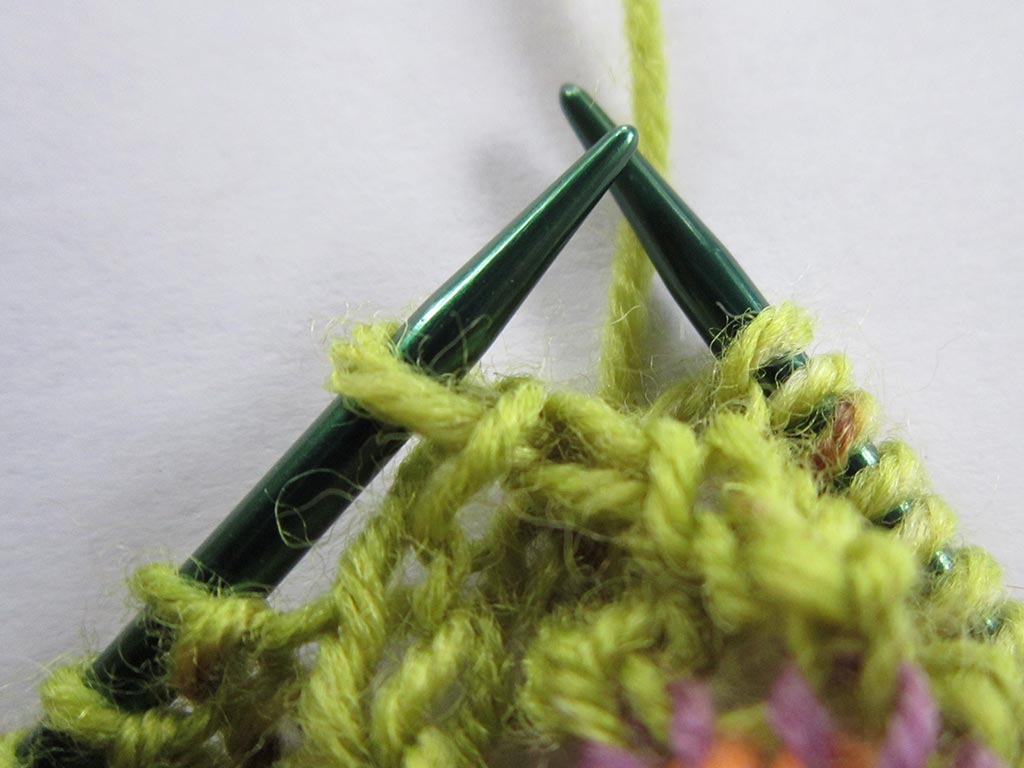
2. Move the sssk stitch you just completed to the left-hand needle.
move stitch just made to left-hand needle
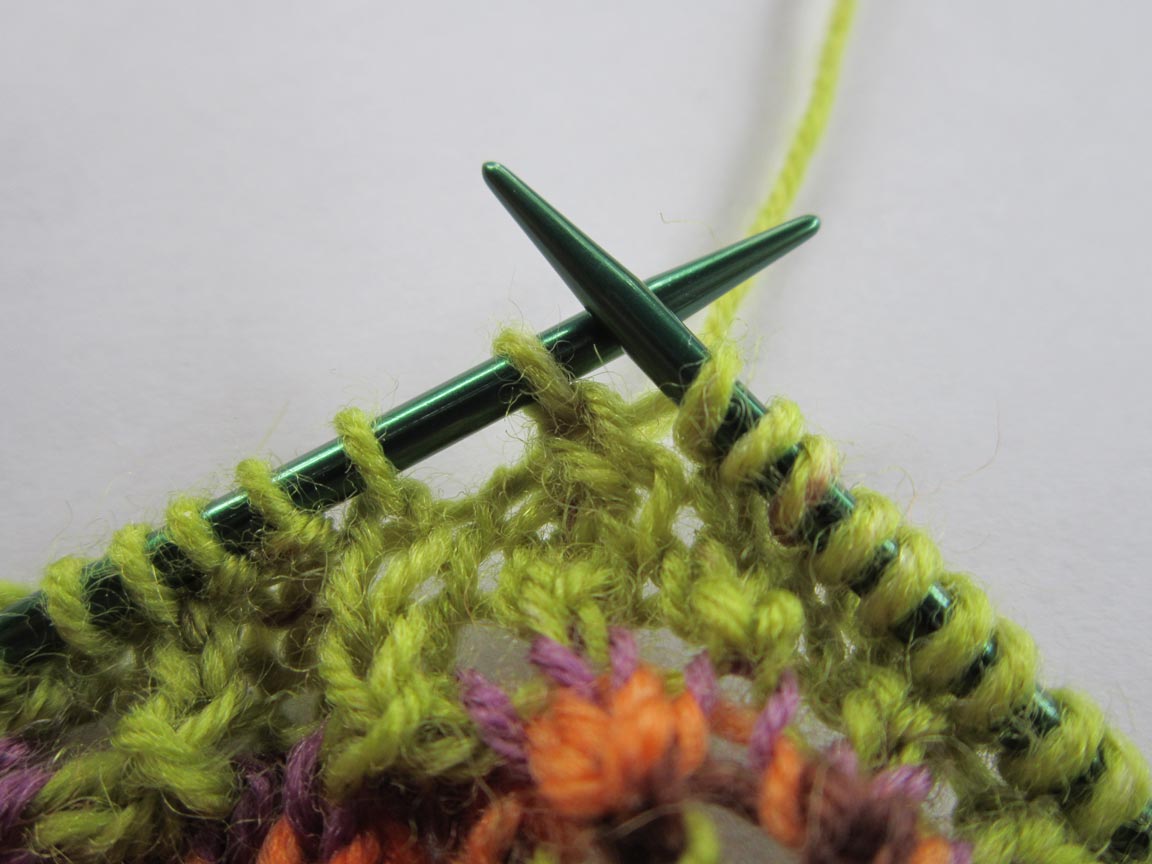
sssk on left-hand needle
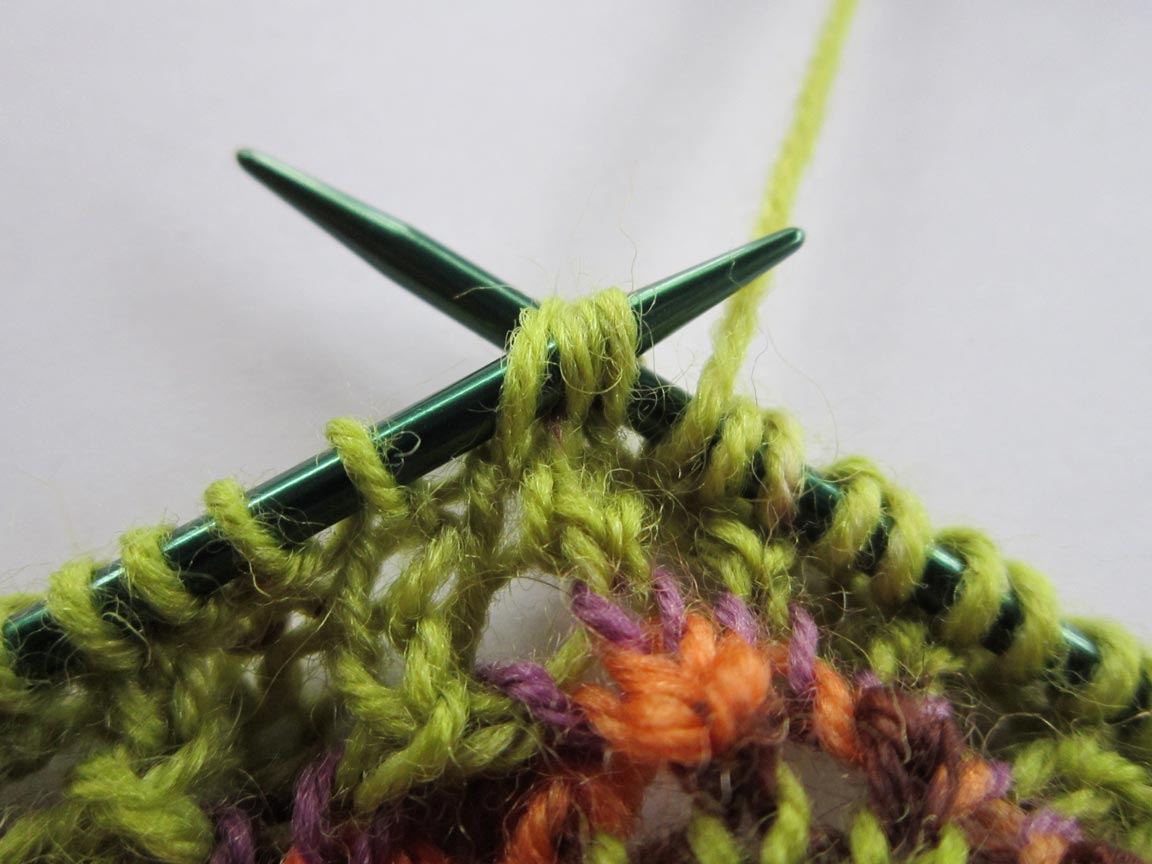
3. Pass next stitch over.
Pick up the loop of the next stitch after the ssk stitch and pass it over the sssk stitch as follows:
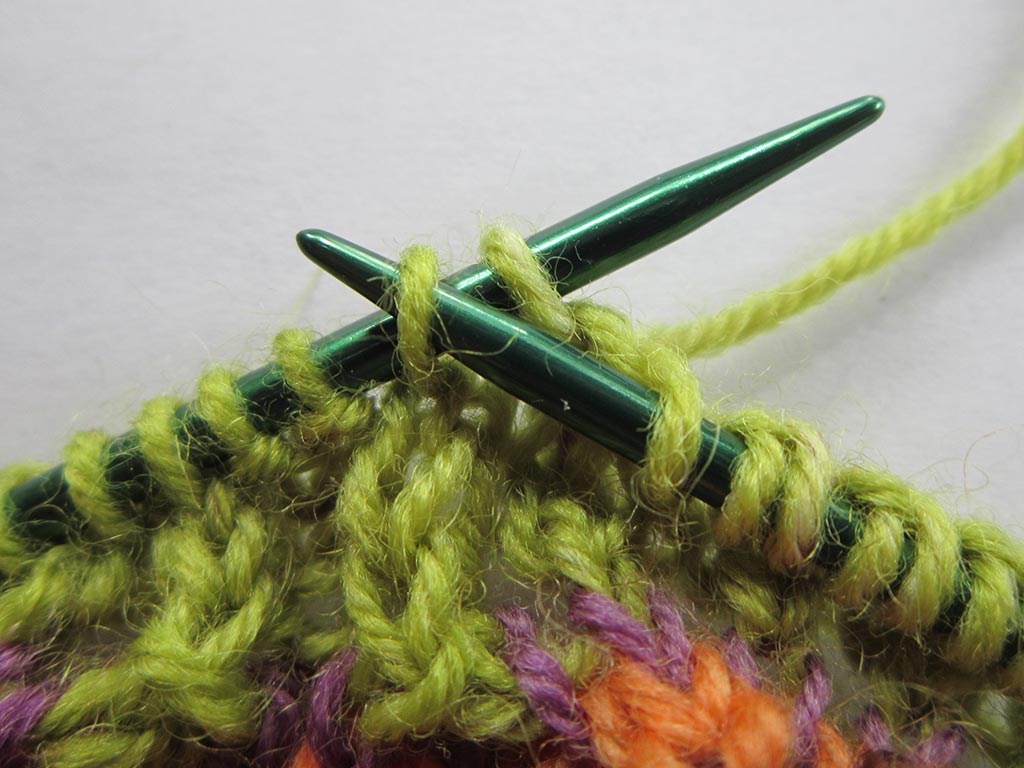
insert right-hand needle purlwise into next unworked stitch
pull stitch over sssk …
… and off the left-hand needle
drop pulled-over stitch from right-hand needle
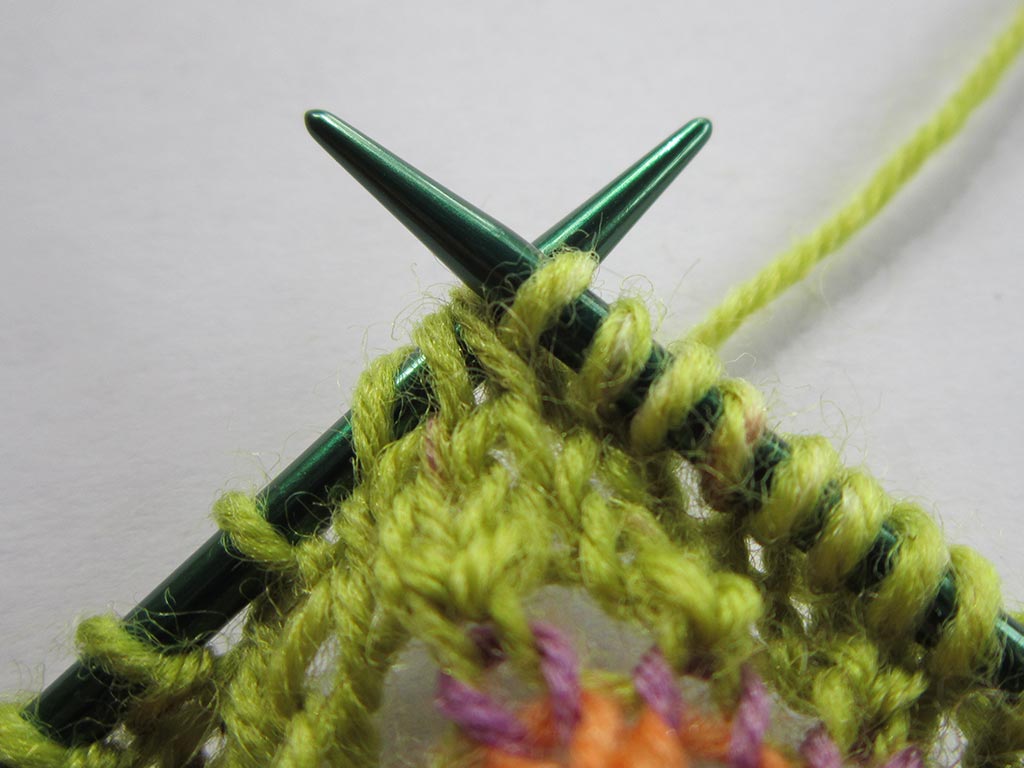
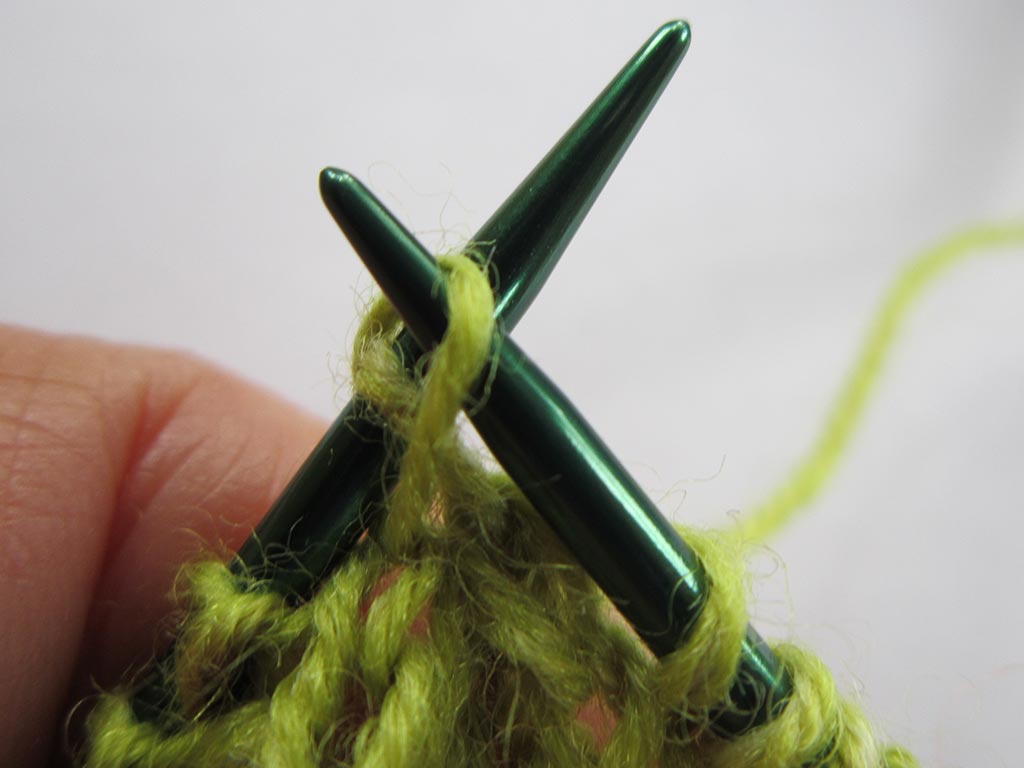
4. Return sssk to right-hand needle to complete the right-slanding triple decrease
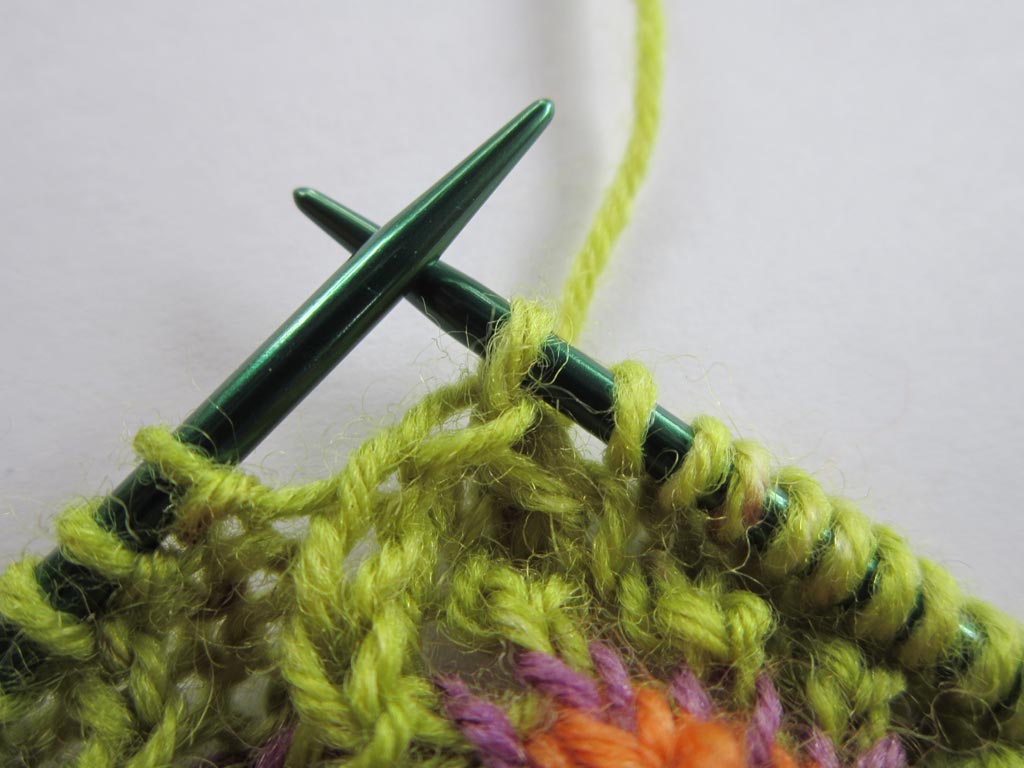
move sssk to right-hand needle to complete the right-slanding triple decrease
How are you doing? Any questions?

 HeartStrings FiberArts
 Knitting Bits of Lace on Facebook
 Ravelry Store