
Beaded knitting is fascinating and fun. There are multitudes of ways to incorporate beads into your knitting. Even the simplest methods produce impressive results.
Beaded knitting methods in BOBBOL 2013 projects (so far)
In previous monthly projects this year, we covered
- Beaded Garter Stitch a.k.a. Placing a Bead between Knit Stitches from the wrong side of the fabric (Beading Hearts Friendship Bracelet)
- Placing a Bead between Purl Stitches from the right side of the fabric (Mini Lace and Beaded Flag)
- Crochet Hook Method with Bead Hooked before completing the stitch (Pretty Awesome Yarn Pouch)
- Crochet Hook Method with Bead Hooked after completing the stitch (Dolly’s Top-Down Tri Shawl)
3 More Methods of Knitting with Beads
In the Holiday Beaded Mini Sock, we will cover 3 more methods of knitted bead embellishment:
- single bead placement in front of a slipped stitch
- swags
- fringe loops
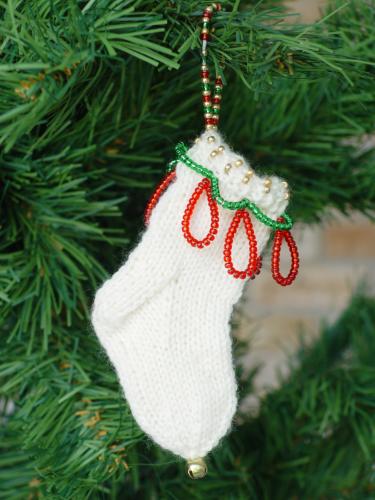
Bells On My Toes Holiday Beaded Mini Sock
These 3 methods require that the beads are pre-strung on your working yarn. To add to the interest, this project uses 3 different color beads that need to be strung in a certain color sequence.
Assuming you have your materials together as posted in the Shopping List of the Kick-off Post for Christmas in July KAL, then let’s get started getting those beads on the yarn!
Bead Stringing Instructions
Step 1: Yarn preparation
Be sure you have done the Preparation as described in the Kick-Off post.
Step 2: Prepare your bead stringing needle
Thread your bead stringing needle with your yarn.
Tip: If you have trouble getting your yarn through the eye of the needle, you can make your own larger “sewing thread eye”:
- Thread the eye of your needle with the short length of sewing thread.
- Holding both ends of the sewing thread together, make a simple overhand knot and pull snugly.
- Clip the ends of the knot a short distance from the end.
- Now you have an “eye” through which you can easily pass your yarn.
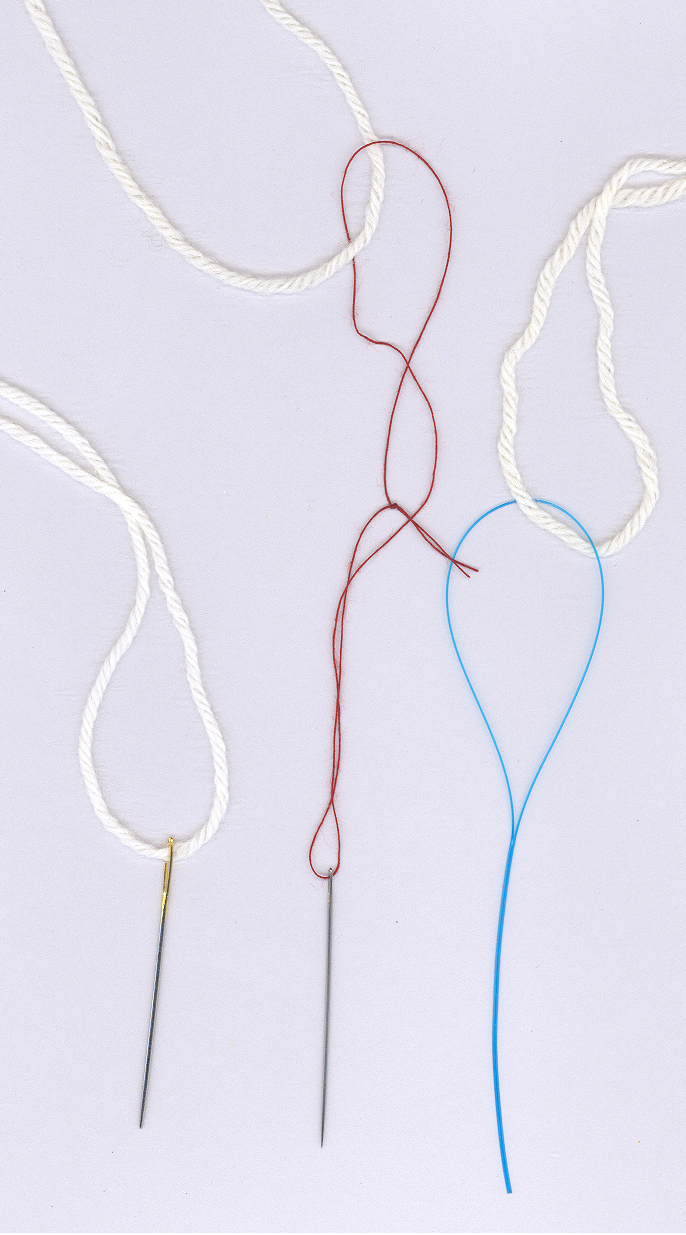
Examples of bead stringing needles threaded with yarn and ready for stringing beads:
- Left – small tapestry needle
- Middle – regular sewing needle with a “sewing thread eye”
- Right – nylon collapsing eye needle (dental floss threader)
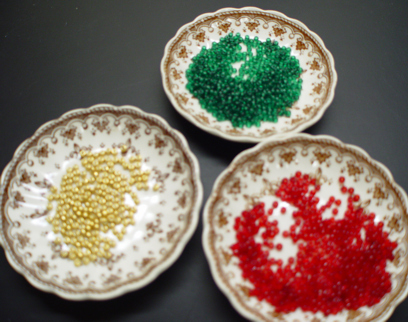
Step 3: Put each color bead in its own shallow container
Put beads into shallow containers, one for each color. Small bowls/saucers, shallow box lids, or anything similar will work just fine. We just want to be able to easily access the beads without them rolling away!
Step 4:
IMPORTANT: The color sequence in which we string beads is in the reverse order to the order in which they will be knitted.
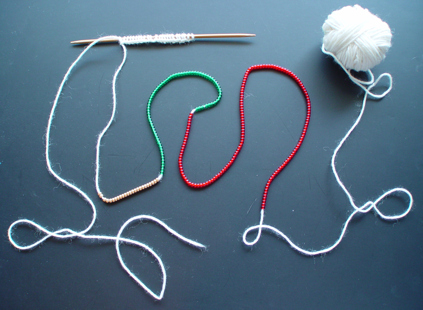
Thus, for the project as pictured above (and since the mini sock is worked cuff-down), you will need to string beads onto yarn as follows:
150 red, 72 green, 24 gold (or your choice of colors)
Tips for getting the beads on your bead stringing needle
How you get the beads onto the needle is a personal choice. Practice makes things go faster, so be patient and just experiment with what works for you best. Here are various ways you might try:
a) Some people like to “scoop” the beads onto the needle tip by dipping the needle into the bowl/saucer in a somewhat sideways action. The beads find their way onto the needle in a hit-or-miss fashion.
b) If using a firm tapestry or sewing needle, some people like to place the needle tip just to the side of a bead hole and “pop” the bead onto the tip.
c) I usually just pick up a few beads in my fingers and place them onto the tip of the needle.
After bead(s) are on the needle tip, tilt the needle upwards to let gravity slide the beads closer to the eye of the needle. If you put your thumb over the bead(s) that are already on the needle, you can re-scoop or re-pop or otherwise put several beads on the needle. Then push the beads down over the eye of the needle and onto the yarn.
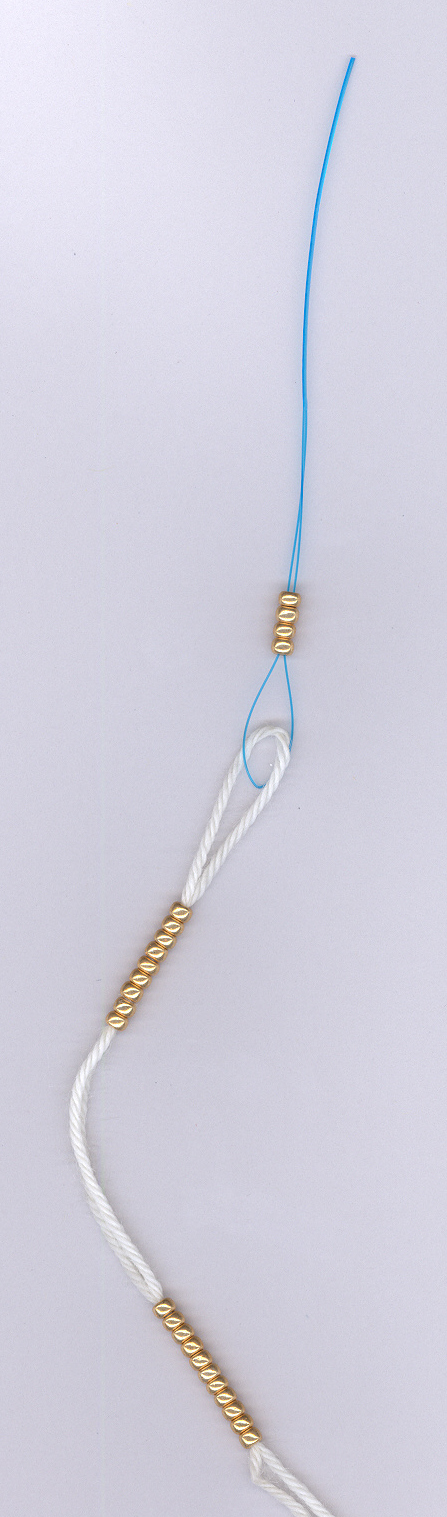
To left: I’m just about finished stringing my beads. The red and green beads are already pushed down along on the yarn (not shown in this picture), and the gold beads are the last ones to be strung since they are the first to be used.
Good Practice #1
Watch for defective or mis-sized beads as you go, and remove/discard these beads rather than stringing them onto the yarn.
Good Practice #2
Count the beads strung onto the yarn as you go, and then count again carefully once more before proceeding with casting on the stitches for your mini sock.
You will be sliding your beads back along the yarn as you knit, to hold them out of the way until needed.
Next Up
I’ll be back soon to go step-by-step through the 3 methods that are used in the mini sock. Any questions up to this point?

 HeartStrings FiberArts
 Knitting Bits of Lace on Facebook
 Ravelry Store
I stopped by Hobby Lobby on my way home, and they don’t carry the 8/0 beads – they only carry either the 6/0 or the 10/0 beads. Would either of these work or should I go on line to find the 8/0 beads?
Thanks!
You will be able to string the 6/0 size on the fingering weight yarn, but they will be too large and heavy for the gauge and yarn designated for this project. IF you can string the 10/0 size on the fingering weight yarn, they will give a different look since they are 1/3 smaller. Maybe check for other local sources before going online?
I tried Joann’s this weekend – they don’t carry a 8/0 and the clerk was almost rude in her insistence that this was a very unusual size and that any of the other sizes they carried (the 6/0 and 10/0 would work) without asking what I was working on. Not the usual level of service for this store – I won’t be going back there for any future bead purchases.
Will try Michaels – if they don’t carry, will have to go on line.
Thanks for your help – the project looks great and I’m looking forward to making several for Christmas gifts this year.