Behind the Design Scene of the Mini Lace and Beaded Flag
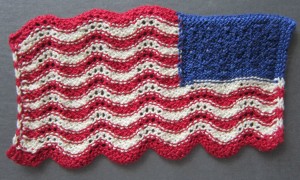
The knitted miniature representation of the U.S. Flag for this month’s project features an attractive use of beads.
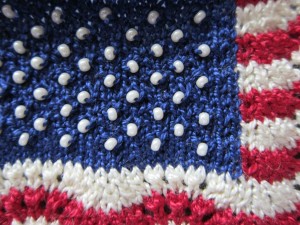
 The beading method used for the Mini Flag project positions a tiny bead on the running thread between 2 stitches.
The Beading Truth
Beads want to go to the bumpy side of the fabric (and will do so unless something is holding them back).
To keep the beads facing to the right side of the primarily stockinette fabric, this design places beads on right side rows differently than wrong side rows.
On right side rows, this means you purl a stitch before and after the bead.
On wrong side rows, you knit a stitch before and after the bead.
Wrong side bead placement was essentially what we used in the the Friendship Bracelet project earlier this year. The difference is that the resulting fabric was garter stitch for the bracelet project and all beads were placed from the wrong side. For either project, the result is that beads do not show on the back/wrong side (except to the extent that they might occasionally peek through the threads).
Slipping stitches above the bead placement
Unlike the slip stitches along the tubular side edges for which the stranded thread is pulled up to close the gap, the slipped stitches above the beads in the blue union should have a loosely stranded thread across the area of the slipped stitches so as to not create widthwise distortion.
Are you wondering why all the bother of slipping stitches above some of the rows where beads were placed?
I used this to pull the beads up midway between 2 rows. It was necessary to visually achieve equal distances between alternate horizontal bead rows in the blue union while maintaining proportional design to the rows of the stripes.
How are you doing with this project? Any questions? Let me know. I’ll be back soon with words about completing the mini flag.


 HeartStrings FiberArts
 Knitting Bits of Lace on Facebook
 Ravelry Store