In this month’s project for the Lace Bug Bookmark, I introduced the double yarn over technique. This design element is what makes the distinctive large eyelet in the lace edging.
As a quick overview, the instructions call for you to “yo twice” on Row 1 (i.e. a double yarn over). Then on Row 2, you are instructed to “k1 and p1 into the double yo of Row 1”.
Let’s take it through it’s steps. The double yarn over is not difficult, but it can be tricky to control the looseness of the loops when using fine yarns/threads or working on slick needles. Practice makes perfect. Let these detailed photo steps help you gain confidence that you are on the right track.

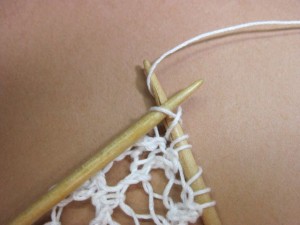
Wrap the yarn over the needle again to make the 2nd yarn over loop, then complete as usual the knit stitch that follows

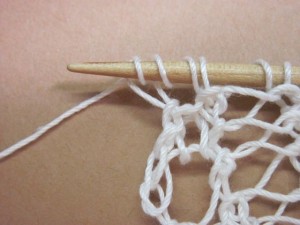
See how the double yarn over is simply 2 extra loops sitting on the needle between the 2 knit stitches

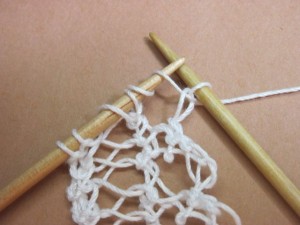
This is what things look like after you've turned the work to the other side and slipped the first stitch; you are now positioned to start working into the two yarn over loops of the previous row

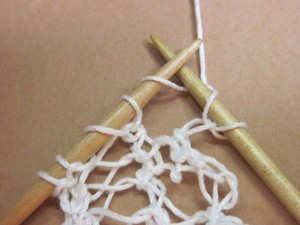
Complete that knit stitch as usual and drop the yarn over loop you had worked into off the left-hand needle
You’ve completed knitting into the first yarn loop at this point. You still have the second yarn over loop on your knitting needle. Do you see that?
Row 3 is straightforward. But that is when it becomes more apparent that there is a little nubb on the top of the large eyelet formed by the double yarn over. This is because of the crossing over the yarn strand from knit to purl. I can almost see a heart shape there where the little nubb is the top of the heart. But then, we love hearts here at HeartStrings, lol.
There are some alternative ways to work the second row of the double yarn over. But they all produce some kind of little decorative element like this. This could be something we come back to covering more at a later time,
By the way, if you are wondering if you can just knit the first yarn over loop, and knit the second so that there is no decorative nubb element, try it and you will see how it fails.
If you are thinking a double eyelet is too large or loose for your method of knitting, there is a simple way to substitute a single yarn over followed by a k1, p1 into that single yarn over loop on the following row. I’ll be back with a little photo series about that later in the month in case you need more help in seeing the details.
I hope this helps you see and understand better what is going on in making this interesting decorative element in lace. What do you think?


 HeartStrings FiberArts
 Knitting Bits of Lace on Facebook
 Ravelry Store
When knitting back the double yarn over, I tend to K the first YO and Ktbl in the second. It leaves a simple (cleaner?) line and I can do it faster than K-P.
Pingback: Substituting a single yarn over for a double yarn over eyelet | Knit HeartStrings
I must not be holding my thread (yarn) correctly, because when I did the lace for the baby socks, it turned out much larger than expected. It looked okay… I think I need a lot of practice. I’ve crocheted use what I call crochet cotton, so that’s not new to me. Knitting with crochet cotton is… maybe the needles are too large (size 2 for no. 10 thread). I’ll try this pattern over the weekend see if I have the same issue.
I’m really pleased I signed on – am learning so much, it’s taken away the FEAR ♥
This explanation makes ALL the difference in the world!!! Thank you so much for the clear step-by-step pictures!! You have a way of removing the mystery of the technique! Lace knitting here I come!! 😉
Thanks for the tutorial, Jackie. That would have had me flummoxed for sure.