After the crown portion of the Lace Doily Beret is completed, several techniques are used to shape the remainder of the hat. None are difficult. By themselves, and together, they are easy ways to manipulate knitted shapes in 3 dimensions.
The Lacy Openwork Ground
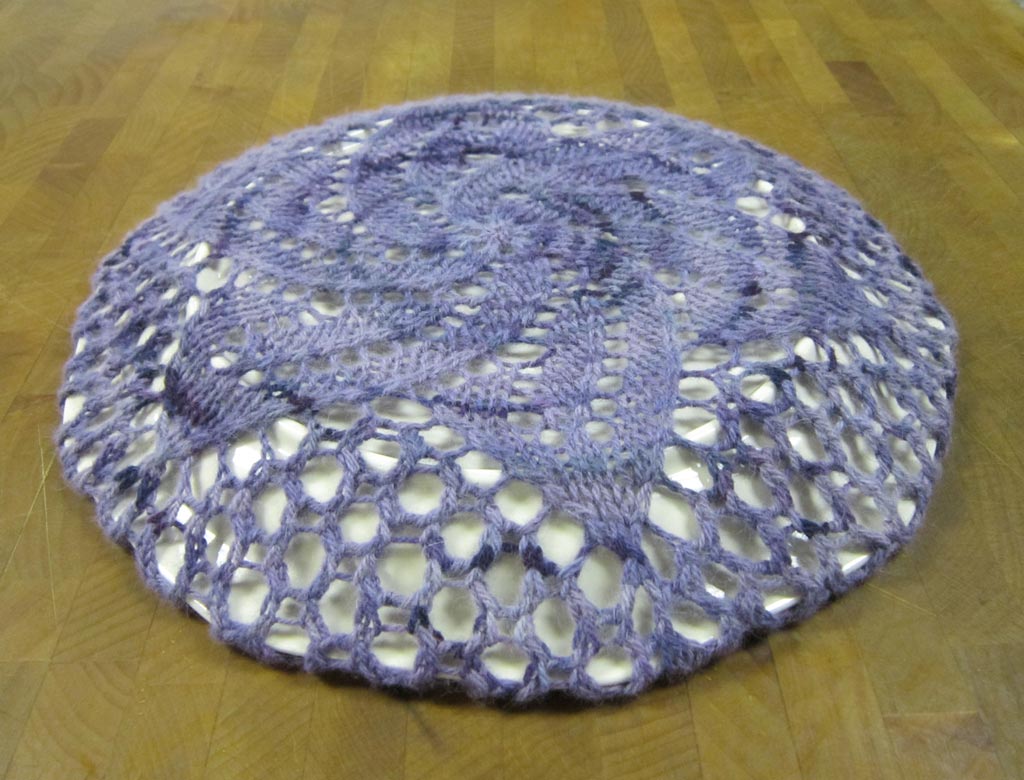
For the Lace Doily Beret design, Honeycomb Lace stitch is used as the ground against which the more solid pinwheel motif is set. The lacy ground begins at Round 23, filling in the fabric space between the pinwheel spokes as the crown circumference increases. After the Pinwheel is completed, the Honeycomb ground continues as the main fabric for the hat.

honeycomb lace fills in the background around the pinwheel motif
Very lacy, openwork ground stitches such as Honeycomb Lace are particularly adaptable to manipulating in 3 dimensions. Because so much of the structure of Honeycomb Lace or similar ground stitches is air, there is a lot of flexibility in manipulating the shape as desired. For the Lace Doily Beret, we use these 3 easy techniques to achieve the distinctive beret shaping:
- graduated needle sizes
- eyelet size
- blocking
Beret vs. Tam
Oftentimes, the terms “beret” and “tam” are now used interchangeably. Going back to their origins, there are some shaping characteristics that differentiate their styles.
Beret is of French origin and is characterized by being flatter and often worn atop the hair and tilted on the head. Tam is of Scottish origin and is characterized by being deeper to hold your hair inside.
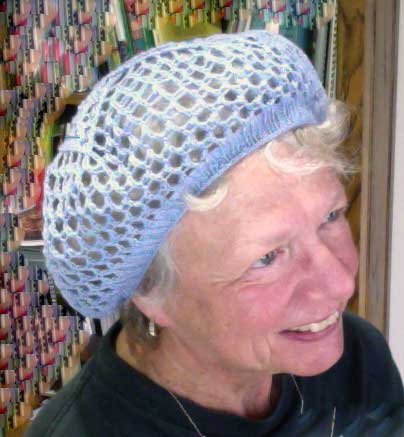
As planned in the pattern, Lace Doily Beret creates a shallow French-style beret 10″ – 11″ in diameter.
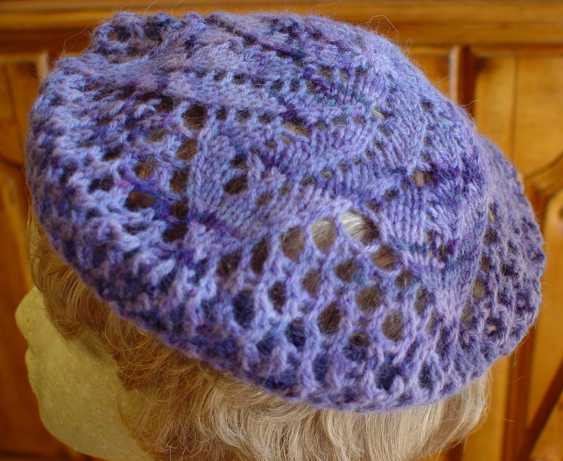
Lace Doily Beret
For a deeper tam, work the sequence of rounds 35 – 38 once or more before beginning the Underside instructions. (Note: For the below tam, I worked rounds 35 – 38 just once before beginning the Underside.)
Lace Doily tam version
Graduated Needle Sizes
Beginning with round 37 of the underside, the needle decreases one size. Then the needle decreases yet another size on round 43. This step-down of needle sizes is an easy way to narrow the circumference for the underside without any complicated decreasing in pattern stitch. It also allows the eyelet ground to visually continue uninterrupted.
Eyelet Size
Another subtle technique that decreases the circumference of the underside along with the graduated needle sizing is the replacement of the double yarn over with a single yarn over beginning with round 39. This results in the eyelet being smaller as the underside approaches the headband.
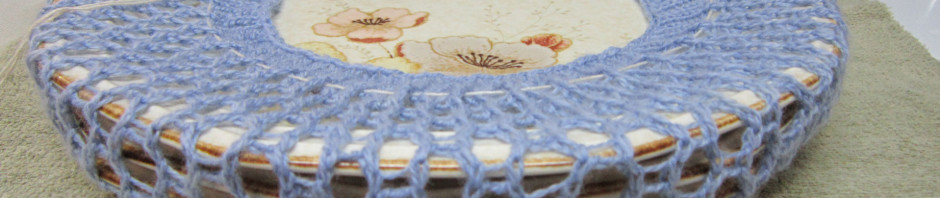
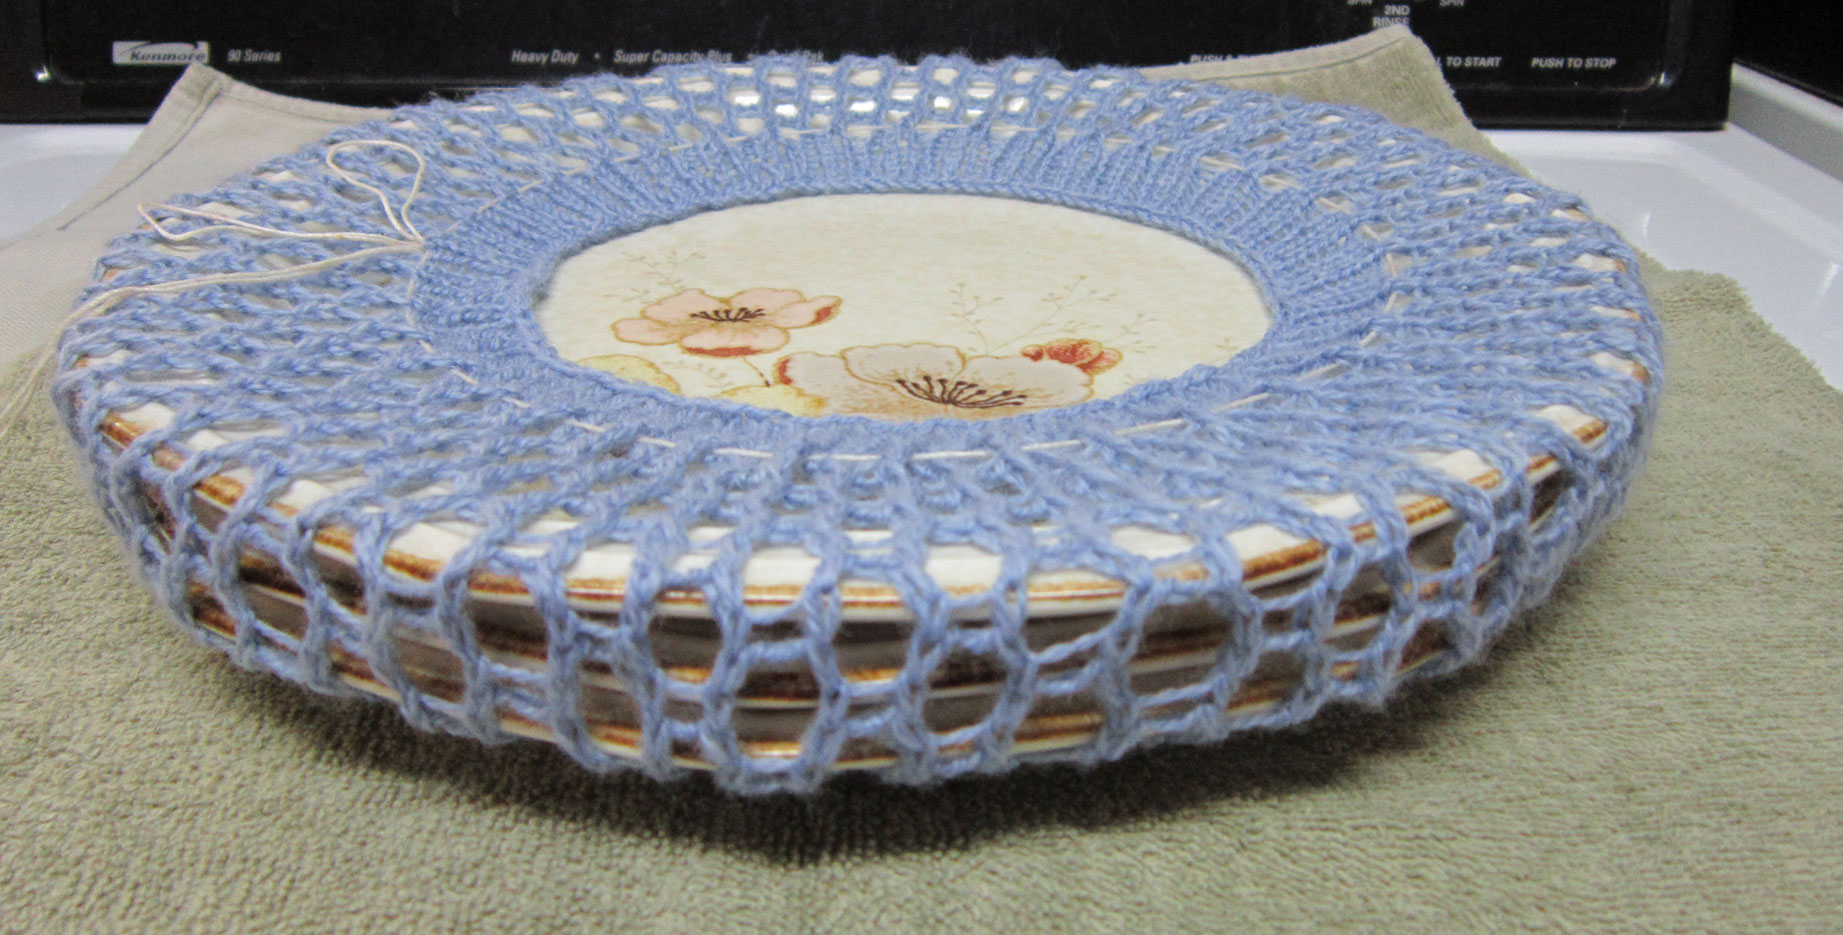
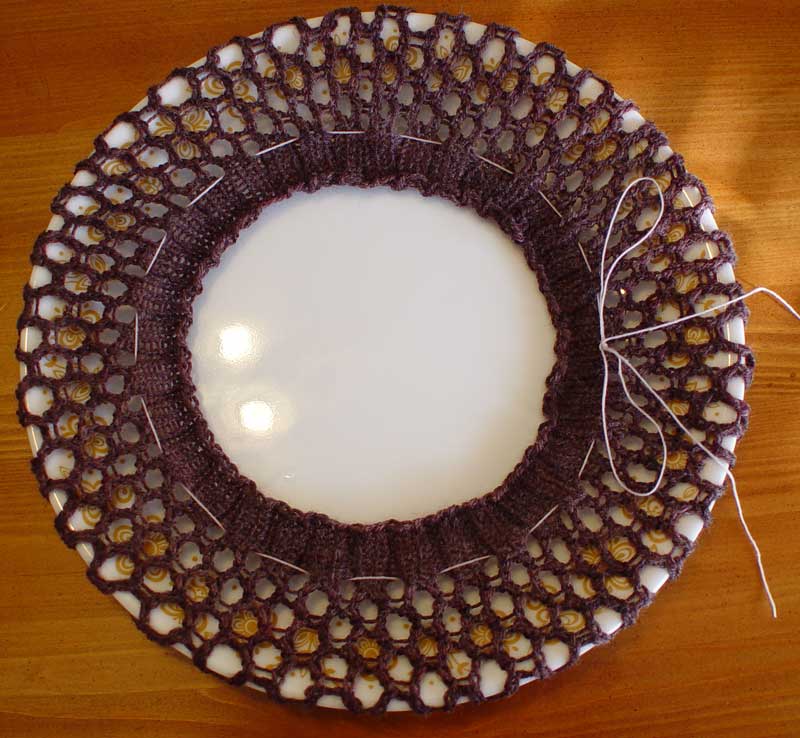
Blocking Over Plate(s)
Blocking the beret/tam opens up the lace and produces the completed shape. Using a plate or shallow bowl for blocking the beret works well, placing the crown over the dome-shaped side of the plate.
Use one plate for the flatter beret style. For a deeper tam, I tried more than one plate which worked well enough (or perhaps you can come up with something similar you have on hand that would work similarly to produce your desired 3-dimensional shape).
blocking over a stack of plates for the deeper tam version
You don’t want the ribbing of the headband to stretch out, so I suggest lacing a temporary string as shown here and described in the pattern.
using a temporary string to avoid stretching the headband during blocking
Let your beret/tam dry completely in its tensioned/blocked state before removing from the plate(s). Then wear and enjoy!

 HeartStrings FiberArts
 Knitting Bits of Lace on Facebook
 Ravelry Store
????????
I clicked on a link “Selecting Materials and Supplies for Filet Lace Knitting ” and got this instead.
Apparently I didn’t change a link from the prior postcard. The correct url is
http://www.knitheartstrings.com/tips-techniques/tips-for-selecting-materials-and-supplies-filet-lace-knitting.php
You can also always find recent articles listed on the site in the sidebar under the heading “Recent Posts“.