The 2nd of the 3 beading methods used in the Holiday Beaded Mini Sock is for creating a swag of beads.
A “swag” is what you might do with holiday garland when you fasten it at each end and let it hang down a bit in the middle.

To create a swag with beads
Prerequisite. However many beads needed for the swag(s) need to have previously been strung on the working yarn.
Step 1. Begin the swag with a p1 stitch.
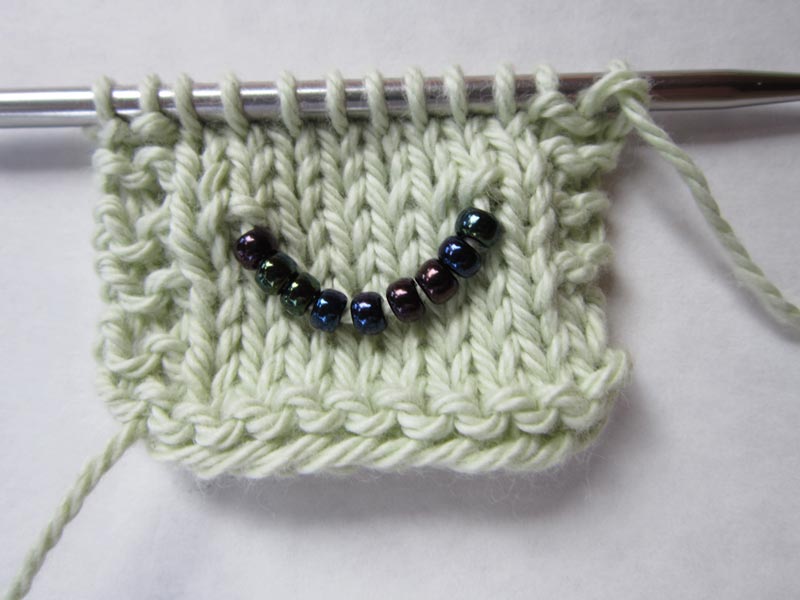
Step 2. Slip 2 or more stitches while still keeping the yarn to front of work.
Step 3. Slide several beads along the working yarn so that they are scooted up close together, with the first bead right next to the p1 stitch that you made in Step 1.
Tip: When designing your own swags, you can use however many beads will give a pleasing shape to the swag. 3 to 4 times the number of beads as you have slipped stitches is probably a good guideline. Fewer beads will make the swag shallower. More beads will make the swag hang down more in the middle.
Step 4. End the swag with a p1 stitch. Take care that no beads are pulled through the p1 stitch AND tension the yarn so that no extra space is left between the beads (or at least as little as possible).
Tip: Depending on the yarn you are using, it might still want to stretch out a bit with the weight of the beads, so draw up the tension if needed on the yarn a bit extra as you make the p1 stitch in Step 4.
Comparing Methods
When you think about it, a swag of beads is really just an extension of the method for place a single bead in front of slipped stitch we covered previously. As a reminder, we used the single-bead-in-front-of-a-slipped-stitch-method for the gold beads in the cuff of the holiday mini sock.
a. Instead of a single slipped stitch, the swag method has more than one slipped stitch.
b. Instead of a single bead, the swag method has several.
Continuous Swags of Beads
The green beads in the Bells on My Toes mini sock were designed to simulate the look of a holiday garland of greenery. Instead of a single swag, the swags encircle the upper leg of the sock.
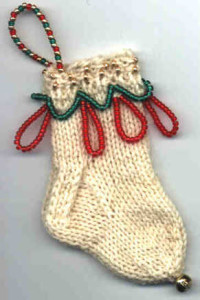
To make the swags of beads continuous, the p1 stitch that ends a swag in the above steps is the same p1 stitch that begins the next swag.
This is how the instructions for the round of continuous swags is worded in the holiday mini sock pattern —
Rnd 7 (swags): (p1, sl 1 wyif 3 times, sl 12 green beads) 6 times.
Note that Rnd 7 uses up exactly all of the green beads.
As usual, check your work before proceeding, as it is easier to correct any miscounting of stitches or beads now rather than later.
Other Ideas for Embellishing with Swags of Beads
Swags of beads can be used to embellish just about anything. Do consider the additional amount of weight they will add in a relatively concentrated area.
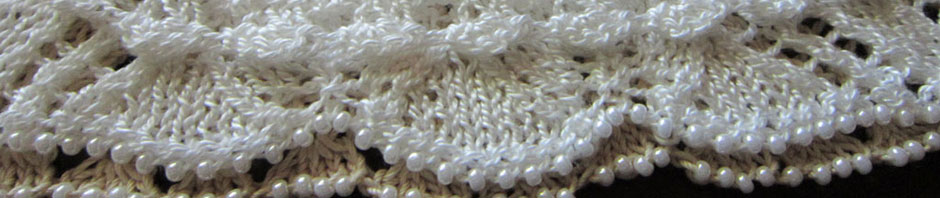
For example, when I designed the variation of Daylight and Shadows Beaded Cable Socks that has beaded swags at the top of the socks, I made sure there was ample ribbing in the cuff of the sock to support the bead weight.
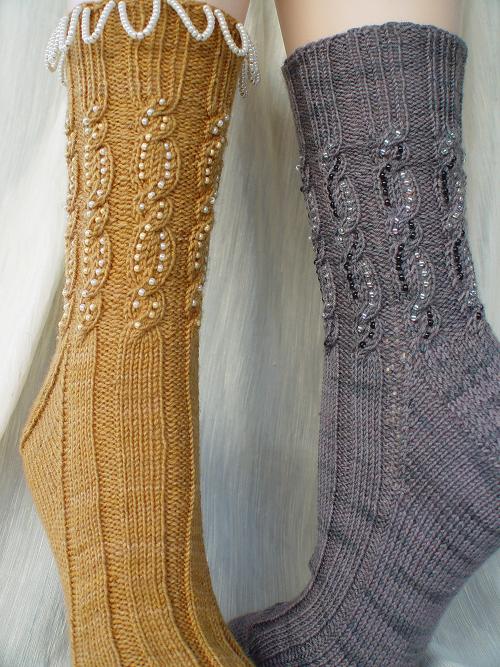
On left: Swags of Beads embellish the top of this sock variation.
Have fun playing around with beads!

 HeartStrings FiberArts
 Knitting Bits of Lace on Facebook
 Ravelry Store