
Hope you are enjoying the dolly shawl knit-along and accompanying articles so far: Roadmap for a Top-Down Triangle Shawl and Setting Up the Center Back Neckline. Here are some things to keep in mind when proceeding with the Main Body of Dolly’s Top-Down Tri Shawl.
Stitch Markers
For the top-down triangle shawl, a charted area corresponds to each side panel in the Roadmap schematic we previously covered. The stitch markers placed on the Setup row help to easily keep track of where the chart sections begin and end. When working the remaining rows of the Main Body of Shawl, just slip these markers from one needle to the next as you come to them.
Tip: Different color markers can help remind you what part of the row you are supposed to be working.
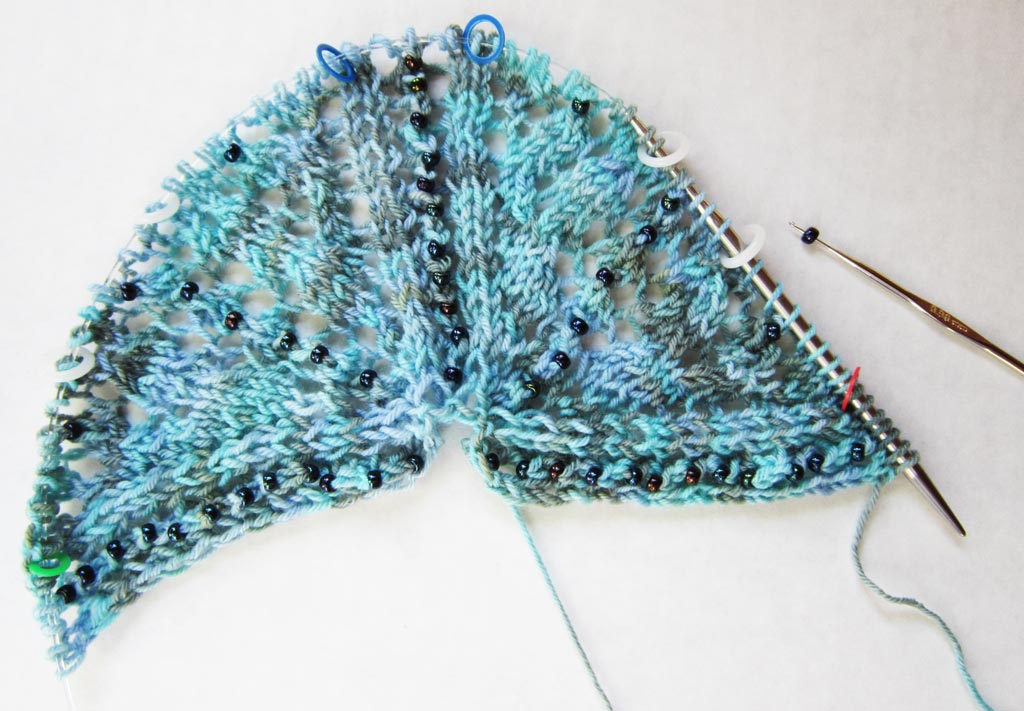
In the below picture, the stitches between the red/light blue pair of markers corresponds to one charted section; the stitches between the dark blue/green pair of markers corresponds likewise to one charted section.
Proceeding with the Main Body of the Top-Down Triangle Shawl
Tip: As the number of stitches increase, extra markers can be used to help delineate the 7-stitch multiples shown by the heavier vertical lines on the charts.
In the above picture, the extra markers are white. Of course you can use any colors you want, but I strongly advise the extra markers can easily be differentiated by either color, shape or something.
Chain Stitch Selvedge
All rows of the main body of shawl begin with “sl 1 (purlwise) wyif” and end with k1. This creates a nice chain selvedge edge that will be stretchable enough to accommodate the extra distance needed across the diagonal leg of the triangle.
You can also review last year’s articles for How You Slip Does Matter and Q&A re. Chain Stitch Selvedge.
Stockinette Lace and Rest Rows
This dolly shawl pattern is another example of Stockinette Lace Knitting. That means that all the lace patterning (i.e. making yarn overs/holes) is done on the RS rows. The WS rows are “rest rows” of (mainly) purl stitches. The exception to the WS row purl stitches is the “sl 1 (purlwise) wyif” at beginning of row and the “k1” at the end of the row as discussed above to create the chain stitch selvedges.
You will appreciate these rest rows more as the shawl gets wider! (Especially if you were making an adult size, which is actually really easy to do with this same doll-size pattern … I will give you tips for this in a future article.)
Placing a Bead AFTER Creating a Stitch
For the Pretty Awesome Yarn Pouch, we used a crochet hook (or equivalent hooking method) to pull a stitch loop through a bead BEFORE working into the stitch.
For this dolly shawl pattern, I wanted you to see why sometimes a design will have you pulling the stitch loop through a bead AFTER creating the stitch.
In the stitch pattern design, beads are placed on RS rows atop some of the cdd stitches. To position the bead properly from the RS, the cdd stitch is created first, then the resulting stitch loop is pulled through a bead. Note: If you try placing the bead before making the cdd stitch, I think you will quickly see your dilemma. Can you guess why?
Tip (for advanced knitters): If you prefer, you can defer placing the bead until the return WS row. To do this, purl until just before the cdd stitch that should have been beaded on the RS row. Before purling into the cdd stitch, place the bead on the loop of the stitch, return the stitch loop to left-hand needle, and purl into the stitch.
Caveat: Since you will be working from the WS, you will have to pay attention more carefully than if placing beads on the RS as directed in the pattern. I myself find it faster to place the bead before making a stitch, so the inconvenience of this “defer until next row” is a good trade off to more careful attention. Your mileage may vary. Give both ways a try and then you can decide what is best for you.
Next Up
Photo tutorial for the edging of Dolly’s Top-Down Tri Shawl.

 HeartStrings FiberArts
 Knitting Bits of Lace on Facebook
 Ravelry Store