The little lace edging used for the Quick Lace-Edged Baby Socks has a picot straight edge that is both pretty and functional. The heading of this lace edging uses a yarn over at beginning of row to form the picot loops. The straight edge remains straight (rather than increasing) because the yarn over is immediately followed by a decrease (in this case, a p2tog).
It is quite common for lace edging patterns to have yarn overs at the beginning of a row, so it is a technique to become comfortable doing.
- If used on the straight edge, they are primarily functional (where they make a stretchy edge that can easily be sewn to stretchy fabrics like the baby socks).
- They can also be used on the shaped edge. That was not the case on the little lace edging used for the baby socks, but you’ll be ready for this later on.
Note: If you need a review of what I mean by heading, straight edge and shaped edge, you can see the schematic of a generic lace edging here.
So let’s get started doing a yarn over at the beginning of a row. It really is quite simple.
1. Start the row with your working yarn held in FRONT of the right-hand needle. Just pretend that your next stitch to be made is going to be a purl stitch (although it might or might not be).
2a. If the first stitch of the row is a KNIT-type stitch (e.g. k2tog or k2togtbl), then you’d just proceed to work the knit-type stitch while keeping the yarn to the front rather than passing it to the back under the right-hand needle. In this case, the yo is automatically formed by the yarn going over the working needle to knit the stitches together.
2b. If the first stitch of the row is a PURL-type stitch such as in the little lace edging pattern for the baby socks (i.e. it is p2tog), then we have a bit of extra work to do than if the next stitch were a knit-type. It’s not much though —
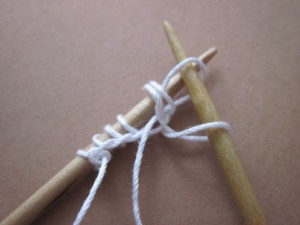
Just wrap the yarn OVER the right needle from front to back and around to the front again. Here is a picture of the loop you will have made.
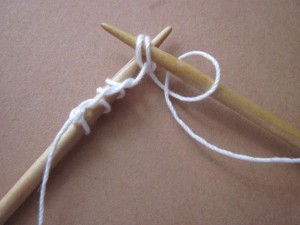
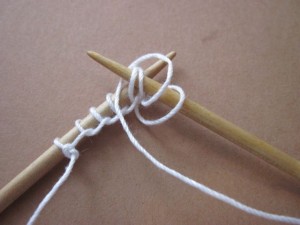
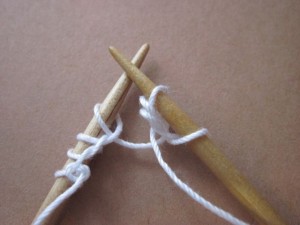
Here are pictures of the sequence of steps in completing the “yo, p2tog” sequence such as used in the baby socks edging:

pull yarn through old stitches to make new stitch (in addition to the yarn over already made on the right-hand needle)
As an additional resource, these are links to videos by Lucy Neatby about doing a yarn over before a knit stitch, and another about doing a yarn over before a purl stitch. She describes it a bit differently than I did above (and the sample she is working is not lace edging), but it works out to be the same.
You Tube video by Lucy Neatby: yarn over at start of row before a knit stitch
You Tube video by Lucy Neatby: yarn over at start of row before a purl stitch
I hope that between the still pictures and the motion videos, you’ll understand and enjoy making yarn overs at the beginning of a row when they turn up in the lace patterns you want to make. Let me know if I’ve missed anything about which you are unclear.


 HeartStrings FiberArts
 Knitting Bits of Lace on Facebook
 Ravelry Store
Pingback: You know more than you realize :: The basic stitches of lace | Knit HeartStrings
Jackie, is there any way for users to establish their own password? Every time I log on using the pw assigned, I receive the Wrong Password message, and have to request a new one. This has now happened 4 times and I’m frustrated. Any thougts?
I have the page set up now to allow you to manage changes to your own profile (including change your existing password to a new password). You’ll need to first login with your existing password to do this. Then click on “Edit Profile” in the menu.